C ImageServer and color space
C.1 Hexachrome printing
This section describes, how the RGB-to-Hexachrome color space printing workflow can be set up.
The workflow which is described below only applies when using QuarkXPress (versions 3-9). Adobe InDesign does currently not support Hexachrome printing.
To enable Hexachrome output on a queue, certain preferences for this specific queue must be set:

-
For this to do, login as “root” and type:
# cd /usr/local/helios
# bin/prefvalue -k 'Printers/<printer queue>/ProcessInks' -t strlist
	           "Cyan","Magenta","Yellow","Black","Orange","Green"
-
To remove the preference again, type the following:
# cd /usr/local/helios
# bin/prefvalue -k 'Printers/<printer queue>/ProcessInks' -d
See also ProcessInks in 9.1 “ImageServer preferences”.
Additionally, the order of the specified colors must match the order in the used Hexachrome profile. If the order in the profile is different, modify the above mentioned command line according to the order in the profile.
- Note:
-
Please note that an inaccurately set preference may lead to faulty results! Read more about the usage of “prefvalue” in the HELIOS Base manual.
-
Assign the Hexachrome profile as printer profile to the specific queue you want to use.
To enforce a Hexachrome color separation, the “ForceHexachrome.eps” must be placed in each page of the document (see below).
If you are using PrintPreview, the spot colors “Green” and “Orange” must be defined in the HELIOS Admin Spot Color editor (see C.3 “The Spot Color editor”). This enables PrintPreview to create a correct composite preview.
All placed images have to be “tagged” with an ICC profile, or must be assigned a default profile per folder/volume.
The HELIOS CD includes a file named “ForceHexachrome.eps”
in the sample-images folder. This file
defines six process colors: Cyan, Magenta,
Yellow, Black, Green and
Orange and needs to be placed in the layout
application to enforce the six-channel separation output for
printing. The file does not contain printable data.
Some Hexachrome profiles are not compatible with the ImageServer software. E.g., a Hexachrome profile using the data color space “MCH6” is not supported by ImageServer. However, in order to still make use of the profile the data color space “6CLR” must be specified.
-
Modify the profile in a data editor, e.g. “HexEdit”, (hexedit.sourceforge.net). Open the profile and replace in bytes 17 to 20 “MCH6” with “6CLR” (without quotes!).
C.2 Multicolor support for image conversion
It is possible to create multicolor images (e.g. Hexachrome) if
appropriate Multichannel ICC profiles (5-8 channels) are used. The option
MultiInkSeparationColors (see 6.1.8 “Image conversion options”)
is optional and can be used to define color names. Otherwise either
color names from the ICC profile are used or own color names are generated
(many Hexachrome profiles do not contain predefined color names).
- Example:
$ layout -oOutputProfile="Hexachrome.icc" -l PCRI_chart.jpg
  "{8BPS}hexachromeimage.psd"
C.3 The Spot Color editor
C.3.1 What is the spot color editor good for?
ImageServer and PrintPreview cannot calculate a composite preview of a separated print job with spot colors if the application which has created the document does not send any process color information for the spot colors in the document.
For this purpose, PrintPreview has built-in color tables which recognize various spot color names, so process color information can be provided for the composite preview generation in PrintPreview. However, if a used spot color name does not match the exact entry in the built-in table, PrintPreview generates a composite preview which lacks the spot colors.
The spot color editor enables the user to define a preview color for a custom spot color name. This allows PrintPreview to include spot color objects in the composite preview.
C.3.2 Setting up the Spot Color editor
A list of spot colors can be created as follows:
-
In HELIOS Admin, open
Spot Colorsfrom theSettingsmenu.
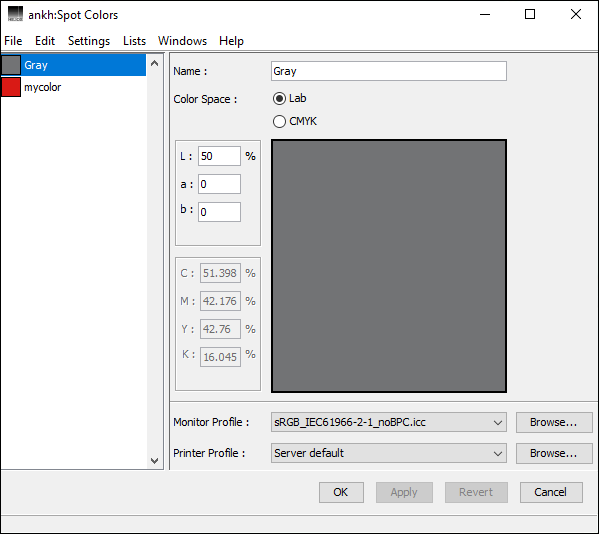
The “Spot Colors” definition window (Fig. C.1), which may already contain the names of some previously defined spot colors, opens. For the definition of a new spot color in the spot color editor, CMYK or Lab values are accepted.
-
Select
File > Newfrom the menu bar.
-
In the
Color Spacesection, select the appropriate color space and enter the values of your spot color. After that, specify a name for the defined spot color and confirm the settings by clicking theSavebutton.
The Revert button sets all entries back to default or, if you
have only modified an entry, reverts to the latest saved version. After
closing the window the new spot color appears in the list
(Fig. C.1).
C.3.3 Accurate spot colors with ColorSync/ICC
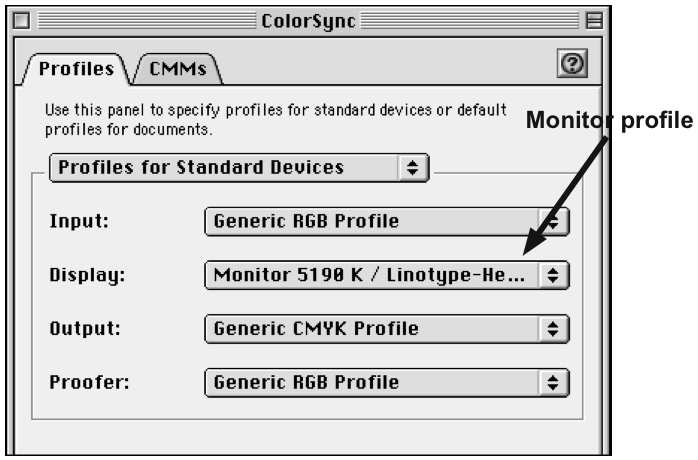
Fig. C.2 shows the ColorSync profile settings for an RGB monitor on Mac OS 9.
- Note:
-
On OS X, go to “System Preferences > Displays” and select in the
Colortab the display profile that suits your monitor.
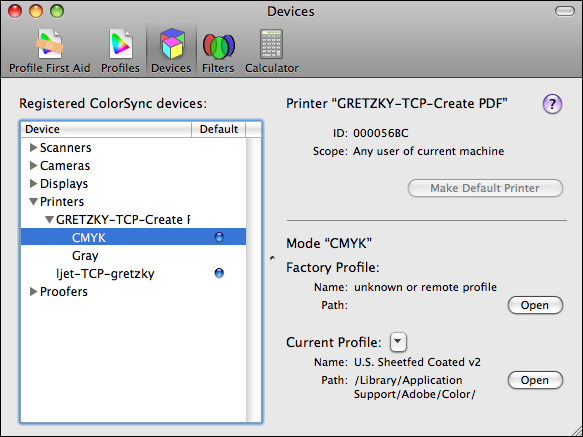
Fig. C.3 shows the profile settings for a CMYK printer on OS X. Both settings are used to represent accurate previews in the “Spot Colors” definition window.
On OS X, the ColorSync utility is used to set profiles.
On Mac OS 9, suitable printer profiles can be chosen in the
ColorSync dialog:
-
Open
Control Panels > ColorSyncfrom the Apple menu and assign appropriate profiles from the pull-down menu to the output devices that you want to use.
These chosen profiles are displayed in the Spot Colors definition window. Fig. C.4 shows an example where the spot color “Gray” has been defined in the Lab color space. The color patch displays the accurate color according to the monitor profile. The CMYK values displayed adjacent to the color patch indicate how the Lab color is converted for printing.
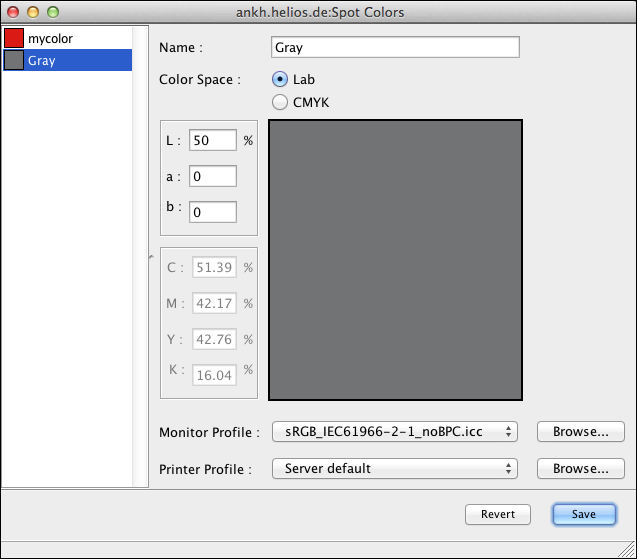
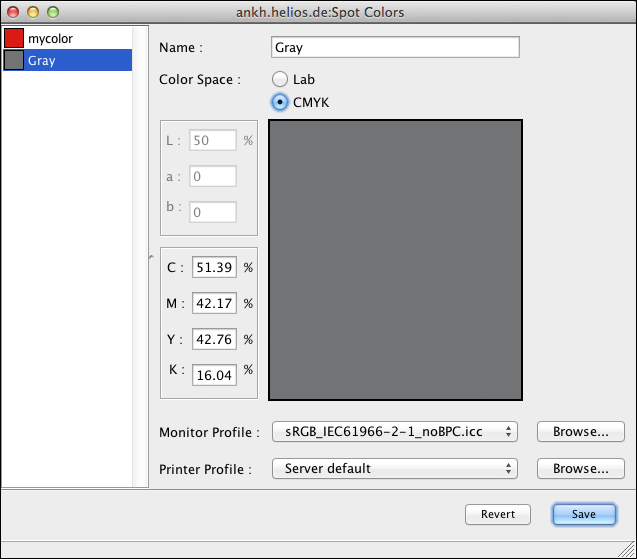
Fig. C.5 shows an example where the spot color “Gray” has been defined in the CMYK color space, according to the selected printer profile. The color patch displays the accurate color according to the printer and monitor profiles. The Lab values displayed adjacent to the color patch represent the CMYK color in the Lab color space.
- Important:
-
Make sure to use the appropriate monitor and printer profiles, which can be created with ICC profiling tools. Wrong profiles, e.g. the default profiles used by Mac OS 9 or bad profiles, will lead to inaccurate results!
Since colors are best and most reliably represented in the Lab color space, it is sensible to enter the color in Lab values which have been determined by a spectrophotometer, e.g. “GretagMacbeth”.
- Note:
-
To make profile changes in the
ColorSyncdialog valid, theColorSyncdialog and theSpot Colorsdefinition window must be closed. The newColorSyncprofiles will be used at reopening the Spot Colors definition window.