4 Administration
This chapter describes the configuration and administration of the WebShare File Server via the WebShare Administration web page. All WebShare administration can also be performed via HELIOS Admin, with the exception of the Branding Editor, and Java Server Statistics. Refer to 5 “HELIOS Admin” for details.

-
Launch a browser and enter the WebShare Web Server address, using port 2009, e.g.: http://hostname.company.com:2009
The WebShare Web Server port number can be changed by means of the WOPort preference (7.6 “Preferences”).
-
Log on to the WebShare File Server according to the instructions in 6.1 “WebShare File Server login”.
In order to have WebShare administrative privileges, a user must log in as “root” (UNIX based servers) or “Administrator” (Windows based servers) or be a member of either the “WSAdm” or the “SysAdm” group. Members of the “SysAdm” group have administrative privileges for HELIOS Admin and WebShare. Members of the “WSAdm” group have administrative privileges for WebShare only.
- Important:
-
After the first time installation of a HELIOS product the “root” and “demouser” passwords are empty and should be assigned as soon as possible!
HELIOS Admin is used to set the “root” and “demouser” passwords as described in “Setting passwords” in the HELIOS Base manual. You can then set additional WebShare host user passwords (see 4.1 “Server Preferences”, below), and assign administrators to the “WSAdm” or “SysAdm” groups. Alternatively, the HELIOS utility program “authutil” can be used to set passwords.
There you will also find a detailed description on how to access and log in to HELIOS Admin.
- Note:
-
HELIOS Admin can also be accessed via WebShare, as an administrative user, in the “HELIOS Applications” sharepoint:
-
From a Mac client, click on “MacOS”, and select and download the “HELIOS Admin.app”. From a Windows client, click on “Windows”, and select and download the “HELIOS Admin.exe”. For other platforms click on Java, select “HELIOS Admin.jar”, and download.
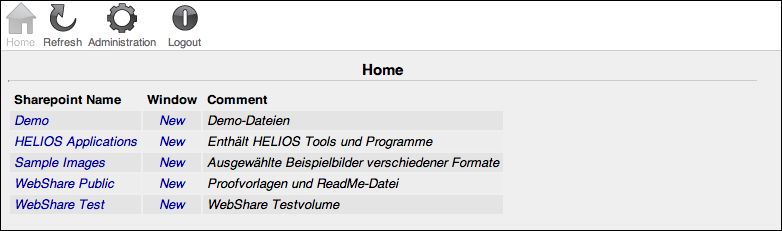
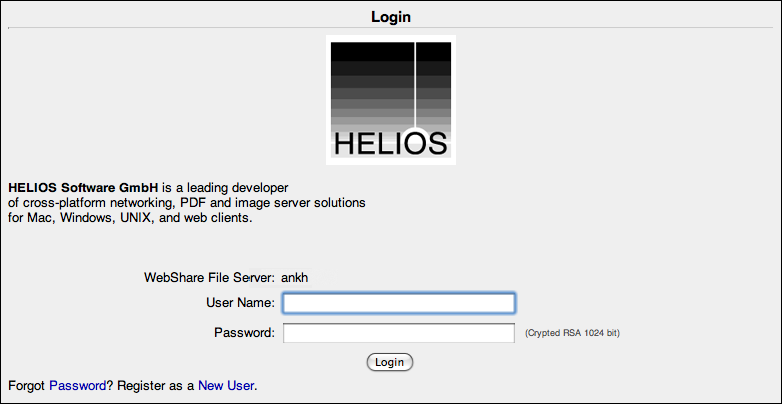
After a successful login to WebShare, the “Home” page appears, allowing quick access to the defined sharepoints (Fig. 4.1).
-
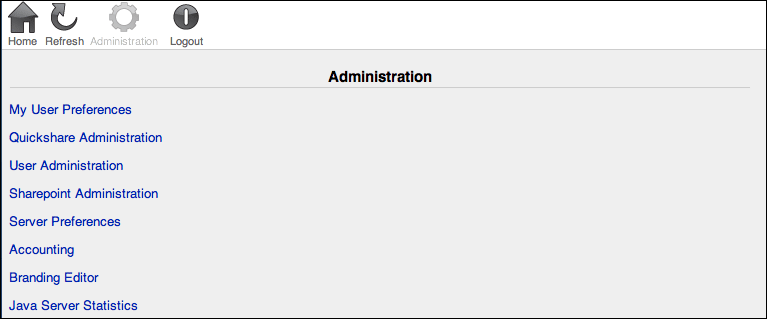
Click on the
Administrationbutton. From within the “Administration” section, select the desired item (Fig. 4.2).
4.1 Server Preferences
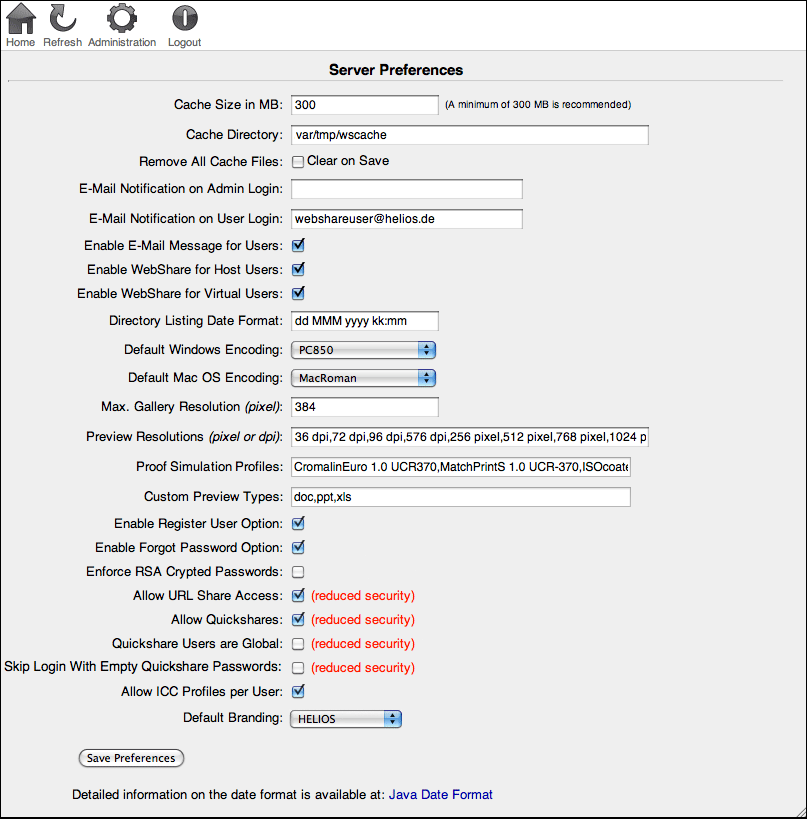
The “Server Preferences” page (Fig. 4.3) allows specifying default values for the WebShare File Server.
WebShare keeps image preview files, which have already
been displayed, in a cache on the WebShare File Server, so
they will open quite quickly the next time they are requested.
The Cache Size in MB and the path to the
Cache Directory are specified in the respective
fields. If the Cache Directory is changed,
the new directory must already exist, and have
full rwx (read-write-execute) privileges for all.
The number of files in the cache is only limited by the
assigned cache size. When the cache is full, WebShare
starts to delete old files in the cache in order to store newer
files. If the Clear on Save checkbox is ticked,
WebShare deletes all cache files upon clicking the Save
Preferences button.
Clearing the cache should be done without any users connected, to avoid login
time-outs during the removal. Alternatively, the WebShare
File Server can be stopped with the srvutil stop websharesrv
command and the content of the cache directory subsequently deleted with
rm -r <CACHEDIR>/*. The WebShare File Server is restarted
via srvutil start websharesrv.
- Note:
-
The default value for
Cache Size in MBis 30, due to the usually limited disk space in “HELIOSDIR/var”. If you change theCache Directorypreference to another path, it is recommended to setCache Size in MBto a value of at least 300 (MB).
WebShare acts as an SMTP client and can send e-mail notifications via an SMTP server running on the same host, or via an external SMTP server.
The server settings SMTPHost and
SMTPSender must be set up correctly
for e-mail notification to work (see
SMTP in “HELIOS Admin > Server Settings”
in the HELIOS Base manual).
By use of the Enable E-Mail Message for Users
option, the administrator can determine whether the Mail
functionality (see Edit > in 6.3 “Work in a sharepoint”)
is available to WebShare users.
Enable WebShare for Host Users and
Enable WebShare for Virtual Users determine
which type of users can connect to WebShare. Host Users
are those users who are listed in the HELIOS password
file “var/conf/passwd” or who are provided via AD/PDC or LDAP.
Virtual Users are user names who have been
set up as WebShare users only, but are mapped to a host
user name (compare 4.3 “User Administration”). If
Enable WebShare for Host Users is not
checked, then individual Host Users can still
be enabled by entering them as Virtual Users. If neither
checkbox is marked, only “root” (or Virtual Users
mapped to the user “root”) can log in.
- Important:
-
Host users must have an entry in the HELIOS password file “var/conf/passwd”. Otherwise they will not be accepted as valid users and hence cannot log on to the WebShare File Server!
The Directory Listing Date Format can be
customized, e.g. according to American or European
date format preferences. For details go to:
docs.oracle.com/javase/1.5.0/docs/api/java/text/SimpleDateFormat.html
The two pop-up menus Default Windows Encoding and
Default Mac OS Encoding specify the default download
encoding for the used client platform. The setting determined
here is applied when OS Default in the Download
Encoding pop-up menu (see 6.7 “My User Preferences”) is
selected.
The Max. Gallery Resolution (pixel) field
allows specifying the maximum resolution for image previews
which can be selected by use of the slider in the WebShare gallery view.
If set to 0 the gallery view is disabled. The
corresponding button (File > Set View > Gallery) will be disabled or hidden
depending on the Show Disabled Buttons setting of the used branding. The
minimum value allowed (beside 0) is 32.
See 4.7 “Branding Editor” for further details on how the initial
and possible gallery resolution values are determined.
The Preview Resolutions (pixel or dpi) field is
used to specify custom resolutions and percentage sizes for remote file
previews and proofs. Preview and proof pages include
four “zoom icons” for which the resolutions can be defined per branding,
in the Branding Editor, by use of the “Preview Resolutions 1-4” preference
(see Toolbar Buttons). In addition, there is a pop-up menu,
which can be used to offer custom resolutions.
This makes sense if preview or proof resolutions or sizes are frequently
required which differ from the default.
The custom pop-up menu dpi, pixel, and percentage values can be specified
in the Preview Resolutions (pixel or dpi) field,
as a comma-separated list. Note that images will not be
scaled up from their original resolution (i.e., if the image
is 512 pixels, and the user selects 768 pixels, the preview
will not exceed 512 pixels). The default values in the pop-up list for
previews and proofs are: 36, 72, 96, 144 dpi and 256, 512, 768, 1024 pixel.
The Proof Simulation Profiles field allows specifying profiles, which
should be available in the ICC Proof Simulation pop-up
menu in the WebShare proof window. You can specify any
profile that is stored in the “ICC-Profiles” volume.
- Note:
-
For this feature the “WebShare Public” sharepoint needs to be published.
If the Allow ICC Profiles per User option is enabled,
WebShare users are allowed to upload and administer their own monitor
and printer ICC profiles on the “My User Preferences” administration page.
These profiles will be selectable in the Monitor ICC Profile
and Printer ICC Profile pop-up menus of the WebShare proof window,
in addition to any globally defined profiles. To benefit from this
feature, HELIOS ImageServer is required.
In the Custom Preview Types field you may enter
suffixes for custom file types that are to be previewed in
WebShare. For this to work, the files must be processed
first (according to the rules given in the “wspreview.pl” script).
For example, doc,xls,ppt (no blanks!) can be specified for
Microsoft Office documents which, if required, are processed
by Tool Server with the “OfficeReader” script. “OfficeReader”
details can be found in the HELIOS Tool Server manual.
The setting of the checkboxes Enable Register User Option
and Enable Forgot Password Option determines whether the
Register as a New User and Forgot Password?
links become available in the login window.
- Note:
-
These options enable the “wsregnewuser.pl” and “wsforgotpw.pl” WebShare utility programs (see 8.3 “WebShare utility programs”). These two sample scripts do not really register a new user, or generate/send a new password, until they have been customized to do so.
With the checkbox Enforce RSA Crypted Passwords checked,
only encrypted user logins are permitted. For this purpose,
JavaScript must be active in the web browser.
If the checkbox Allow URL Share Access is checked,
direct access to a specified WebShare sharepoint or to a document
preview is possible. See 4.10 “WebShare URL Share Access”
for a description on how WebShare link sharing works and
what attributes can be set.
Check the checkbox Allow Quickshares to allow Quickshares on
the WebShare server. While creating a Quickshare, a user
can select the desired remote user from the User pop-up menu in the “Quickshare”
section of the sharepoint file browser. If the Quickshare Users
Are Global checkbox is checked, all Quickshare users are
available in this pop-up menu. If not checked, only those Quickshare
users who were created by the logged-in user are available.
Skip Login With Empty Quickshare Passwords can be checked if the remote
user should be allowed to open the Quickshare links by just clicking on
them, without a prior login on the WebShare server (then the password
must remain empty).
The pop-up menu Default Branding allows
pre-selecting a global branding for all users on the
WebShare File Server. This setting can be overridden for individual users
by the setting of the Branding
pop-up menu on the “User Administration” page
(see 4.3 “User Administration”).
-
Click on the
Save Preferencesbutton to save modifications. Otherwise the changes will not be saved and will be lost.
4.2 Quickshare Administration
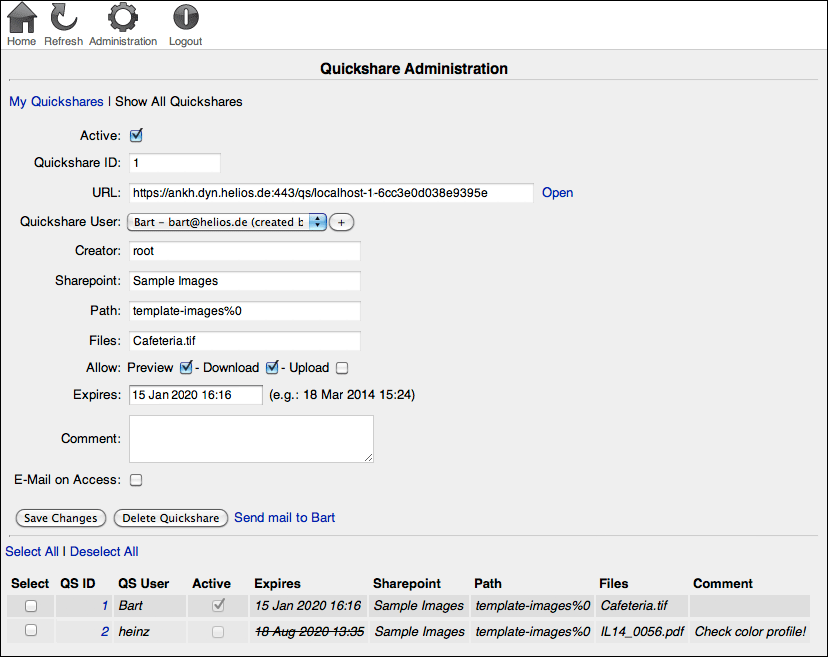
The “Quickshare Administration” page allows users to activate/deactivate
existing Quickshares, delete them, or edit their corresponding comments,
expiry dates, and permissions (Preview, Download,
Upload). In addition, single Quickshares can be re-assigned
to a different user. Non-administrators will see only the Quickshares that
they have created, as discussed in 6.6.2 “Manage your own Quickshares”. WebShare administrators
will have an additional option, Show All Quickshares, which
lists all existing Quickshares.
However, the fields Quickshare ID, URL, Sharepoint,
Path, and Files are provided for informational
purposes and cannot be edited.
- Note:
-
The
E-Mail on Accessfunction will be available in a future version of WebShare:When the user who was provided with the Quickshare link accesses the WebShare server, the creator of the Quickshare can optionally be notified.
-
Select a Quickshare from the table and click on the
Delete Quicksharebutton. Then confirm the deletion.
- Important:
-
Do not click on
Save Changesat this point because the data entry fields still contain the user information, and hence the Quickshare will be re-created!
The “Select” column allows selecting/deselecting all displayed Quickshares at a time.
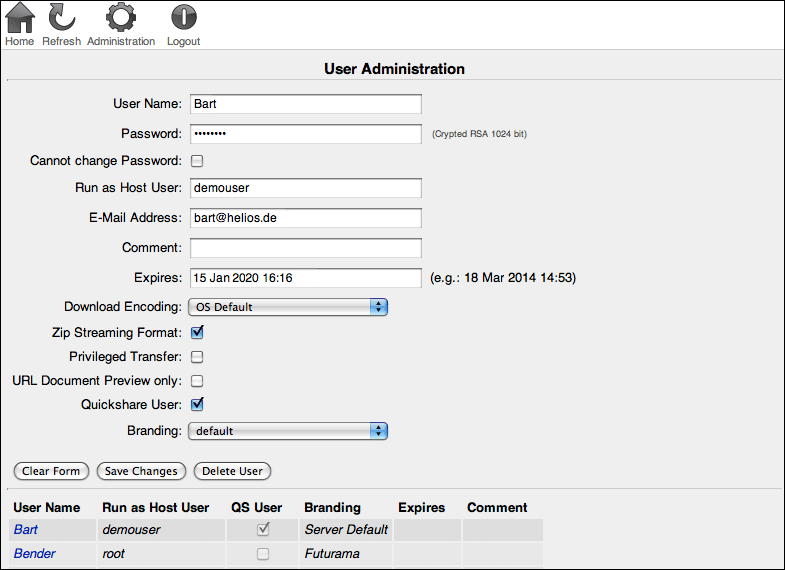
4.3 User Administration
The “User Administration” page (Fig. 4.5)
allows WebShare administrators to specify settings for users. Here WebShare
virtual users can be created and deleted, and WebShare-only passwords
specified for host users. Users can be assigned preset values for
Download Encoding, Zip Streaming Format, and
Branding. Some of these settings can be changed by the users
themselves on their “My User Preferences” administration page (6.7 “My User Preferences”).
In addition, there is the Privileged
Transfer option which reserves a higher transfer bandwidth for the
corresponding user. For all other users, file transfers will then (and only then!)
be restricted to a limited speed (5 to 80 kB/s, depending on
the currently used Internet connection).
The URL Share Access feature allows sharing documents without letting the
user navigate out of the document preview. If the URL Document Preview only checkbox is activated the user (except a user with administrative WebShare privileges!) can only access WebShare by a URL Share Access
link that points directly to a document. The user will not be able to leave the document
preview then. See 4.10 “WebShare URL Share Access” for further information.
If the Quickshare User checkbox is checked the user can only
access the defined Quickshare(s). If no Quickshare is defined, the user
cannot login at all. The Quickshare status of a user can be seen in the
“QS User” column of the user table (see Fig. 4.5).
Normally, new Quickshare users are created by authorized users when they
create a new Quickshare and select the Create new user option
(see 6.6.1 “Create Quickshares”). This has the advantage that a WebShare administrator
is not needed to create each Quickshare user or designate files to share.
In addition, the file permissions (and WebShare branding) of the user
creating the Quickshare are enforced for the new Quickshare user. The
sharepoint settings Allowed Users/Groups and Allow Quickshares
control who can create Quickshares, and for which sharepoints (see 4.5 “Sharepoint Administration”).
- Important:
-
With the
Quickshare Usercheckbox checked, Quickshare users can only log in on the WebShare server if at least one Quickshare has been assigned to them. In addition, they only see their Quickshares!
Windows local users as well as AD/PDC user names, groups and passwords are automatically supported by WebShare. Host user password changes must be done with the respective tools within Windows. Changing the host user password is not supported within WebShare.
Virtual users are created and managed within WebShare. A
virtual name, e.g. Customer A does not exist as a host user.
However, each virtual user must
be assigned to a valid host user account, e.g. “webtransfer”,
using the WebShare Run as Host User setting. In
this case, the host user “webtransfer” must exist with a
valid password on the host and the identical user and
password must be created using the HELIOS “authutil” command.
- Example:
The Windows host user name and password are:
User: webtransfer
Password: secret
An identical host user and password must be created via the HELIOS “authutil” tool in the HELIOS password file:
# authutil passwd -n webtransfer -p secret
WebShare virtual users can change their WebShare password
within WebShare in Administration > My User Preferences.
- Note:
-
Only the virtual user password is changed. The password for the corresponding host user remains unchanged.
Like the HELIOS Admin administrative groups “SysAdm”, “PrnAdm”, “QueueAdm”, the administrative group “WSAdm” must be created via Windows to allow control of administrative rights within HELIOS Admin.
To create a WebShare user take the following steps:
-
In the
User Namefield enter an arbitrary name which need not exist on the host, and can have up to 64 characters. Of course, you may also enter the name of an existing HELIOS user on that host. Then assign a password to the user in thePasswordfield.
- Note:
-
Although a WebShare virtual user can have an empty password assigned by the administrator, they cannot delete their password by themselves. A host user need not have a WebShare password, but it is highly recommended for security reasons. See Change WebShare Password in 6.7 “My User Preferences”.
With the Cannot change Password checkbox ticked, users are
prevented from modifying their password.
If the user specified in the User Name field is not a
host user, then that new user will be a virtual user. That virtual user
name must be mapped to a HELIOS host user name in the Run as
Host User field (note that the specified host user must
already exist on the host).
- Note:
-
It is important to note that “Run as Host User” means that the virtual user will have the file access permissions of that host user. In addition, the virtual user will see in the “User” pop-up list (when creating or modifying a Quickshare) any Quickshare users created by that host user, or by other virtual users mapped to that host user. Likewise, host users that have virtual users mapped to them, will be able to see any Quickshare users created by those virtual users.
If an E-Mail Address is specified, it appears in the individual
user settings (see 6.7 “My User Preferences”). This e-mail
address is used as the “From:” e-mail address if that user
uses the mail feature. If this is left blank, then that user
cannot send e-mail using WebShare. The next two fields
are optional and need not be filled out: Comment serves as a
means to provide additional information on the WebShare
user, e.g. to which company or department they belong (see
Fig. 4.5). An expiry date, after which the user cannot
log in anymore, may be specified in the Expires field.
The syntax must match that from the example next to the field.
Download Encoding specifies the default download encoding
for the user client platform. The setting determined here is
applied as the default in the Download Encoding pop-up menu
(see 6.7 “My User Preferences”). With the Zip Streaming
Format checkbox ticked, the file download uses Zip streaming,
which allows file compression on-the-fly, without
creating any temporary files.
-
After creating a WebShare user or configuring existing users, click on the
Save Changesbutton before proceeding to other tasks. Otherwise the entries will not be saved. To clear all data entry fields and set theDownload EncodingandZip Streaming Formatback to the default values, click on theClear Formbutton.
-
Select a user from the table, click on
Delete Userand confirm the deletion.
- Important:
-
Do not click on
Save Changesat this point because the data entry fields still contain the user information, and hence the user will be re-created!
For a correct table display you may need to update the
window by clicking on the Refresh button in
the WebShare toolbar. The table listing the WebShare users
can be sorted by clicking on the desired column header.
- Note:
-
Deleting users removes only virtual users, and host user WebShare passwords.
In the event that a system administrator needs to drop a user connection, there are three primary methods:
-
Using WebShare, go to “Administration > Java Server Statistics”, and under “WebShare User Statistics”, click
Session Details. Show. Terminate the desired session.
-
Using HELIOS Admin (
Lists > Active Users), show the connections and delete one of them.
-
Or use the
swho -ccommand (see HELIOS Base manual) to list active users and the corresponding process ID (pid). Thenkill -TERM pidcan be used to terminate that process.
4.4 Organize sharepoints
WebShare sharepoints can be organized to suit the required demands, for example, of a production site. The diagram below shows an example where a HELIOS EtherShare or PCShare volume is published via WebShare. At Customer C’s site only the CEO is allowed to have full read and write access to the volume. However, the sharepoint is configured to the effect that the staff at Customer C’s site is only allowed download access. Each user is only able to see their own projects. It is possible to share the same projects for different users with individual permissions.
A WebShare sharepoint can have different task and action rights for different users or groups:

4.5 Sharepoint Administration
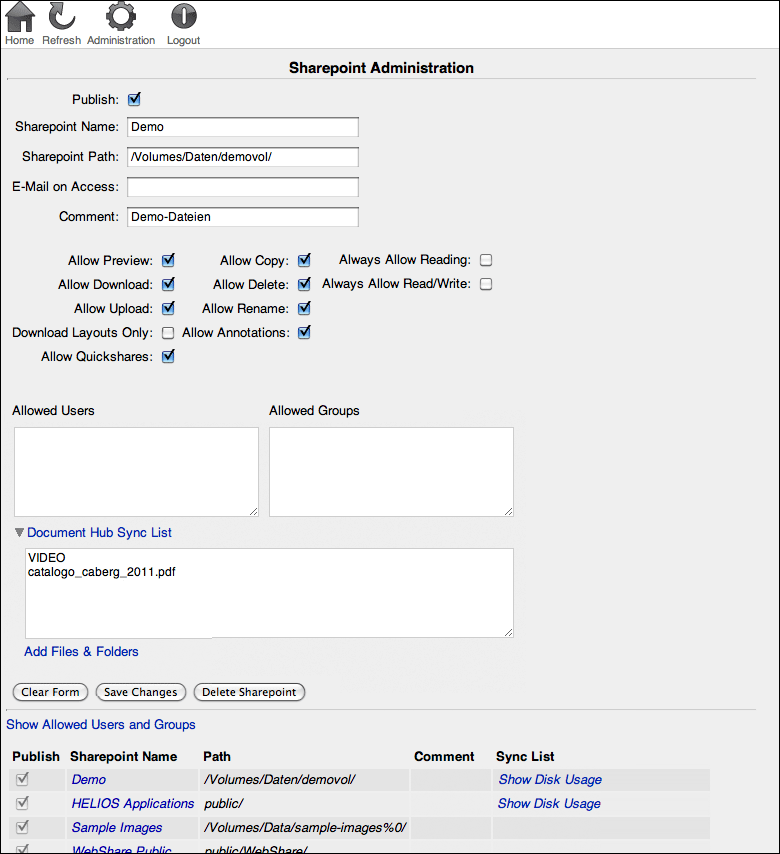
With the “Sharepoint Administration” page (Fig. 4.6) WebShare sharepoints can be created, configured or deleted.
The sharepoint “WebShare Public” is created under the
path “HELIOSDIR/public/WebShare” during the installation.
By default, it has no write access.
In addition, the volume “HELIOS Applications” is created for the user “root”. It has no write access
either.
-
In the
Sharepoint Namefield enter the name you want to assign to the sharepoint, and then specify theSharepoint Path. (Note that the specified path must already exist with adequate access rights on the host.)
-
In the (optional)
E-Mail on Accessfield enter an e-mail address for notification mails after a user has downloaded, uploaded, deleted or just previewed a file, or added an annotation. If an annotation has been added to a preview or proof document, the notification e-mail contains a URL share access link which leads directly to the annotation table (the e-mail is sent as soon as the user has logged off or changed the sharepoint). Make sure that the complete recipient e-mail address is specified, e.g.
webshare@mycompany.com
The optional Comment field allows entering
additional information about the sharepoint. The comments are displayed
on the “Home” page (see Fig. 4.1).
With the Publish checkbox at the top of the window you can
specify if the sharepoint is available at all.
The following options determine whether the buttons in the sharepoint toolbar are enabled (or visible, depending on the “Show Disabled Buttons” setting; see Fig. 4.16):
Allow Preview
Allows previews of documents and image files (see 6.4 “Image and document previews”
for complete details). Please note that this checkbox must also be activated
to allow viewing documents in proof mode.
Allow Download
Allows the download of files and folders from the
respective sharepoint.
Allow Upload
Allows the upload of files and folders to this sharepoint. If desired, Zip
archives are automatically extracted.
Download Layouts Only
Specifies that only files inside layout folders in the
sharepoint can be downloaded. Layout files are low-resolution
proxy files created by ImageServer, for use in OPI aware
page layout applications.
- Note:
-
The
Download Layouts Onlyfunction requires thatAllow Downloadis also active. Otherwise no download action will be possible at all.
Allow Copy
Allows copying, moving, duplicating and pasting files and folders. Also
allows creating directories by use of
the Create Dir option in the File > pop-up menu.
Allow Delete
Allows the deletion of files and folders.
Allow Rename
Allows renaming a file or folder.
- Note:
-
Changing permissions is only allowed if also
Allow Renameis allowed.
Allow Annotations
Allows attaching annotations to a document in this sharepoint.
Allow Quickshares
Allows creating WebShare Quickshares on this sharepoint.
Always Allow Reading
Allows file and folder read access for all WebShare users,
regardless of their host file and folder permissions. This
option only affects the downloading or previewing of files.
Always Allow Read/Write
Allows file and folder read/write access for all WebShare
users, regardless of their host file and folder permissions.
This option only affects the uploading, downloading or
previewing of files, NOT other file management options
(e.g. copy/move/paste).
- Note:
-
The
Always Allow ReadingandAlways Allow Read/Writeoptions will only be available if enabled by a preference key setting. See AllowAllReadWrite in 8.5 “Preferences”.
The Allowed Users and Allowed Groups
fields serve as a means of access control for the sharepoint:
If there are no entries in either of the fields, all WebShare
users can access the sharepoint. Entries in the Allowed Users
field allow only those particular users to access the sharepoint.
Likewise, entries in Allowed Groups allow only
members of those groups to access the sharepoint. Users
who are not allowed access to a sharepoint will not even see
it, it will be hidden from them.
- Note:
-
Valid names in the
Allowed Usersfield may be WebShare user names or host user names. TheAllowed Groupsfield accepts valid host group names. Each entry must be in a separate line.
The Document Hub Sync List link (see Fig. 4.6)
allows you to define files or folders in a sharepoint that should be
synchronized with the mobile device via the HELIOS Document Hub solution:
-
Click on the link and specify the desired files and folders in the text field, or select them by clicking on the
Add Files & Folderslink that opens a new window in which you can select the desired files and folders.
After clicking on Add Selection and Append to Sync
List the selected objects are added to the text field and will be
synchronized with the mobile device on request.
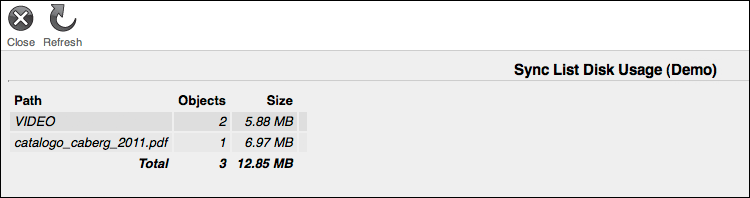
A click on the Show Disk Usage link in the “Sync List”
column opens a new window which gives information on the sync list disk
usage (see Fig. 4.7).
-
After creating a WebShare sharepoint or configuring existing sharepoints, click on the
Save Changesbutton before proceeding to other tasks. Otherwise the entries would not be saved and get lost. To clear the data entry fields click on theClear Formbutton.
To set up different access rights for the same directory on the
WebShare File Server you can create multiple sharepoints,
with the same path but each with a unique name and
different access rights (Allowed Users, Allowed Groups).
Likewise, it is possible to set up different file management and previewing options for the same directory on the WebShare File Server by creating two sharepoints, with the same path but different allowances.
After creating a sharepoint you may wish to view the file permissions corresponding to the sharepoint content:
-
Click on the
Homebutton, and then on the desired sharepoint. UseFile > Set View > Extendedto view the “Permissions”. If you need to change the permissions, refer to File > in 6.3 “Work in a sharepoint” for details.
These permissions will be inherited by any files uploaded via WebShare, and hence determine which users will be able to view files, and change file permissions. Likewise, you may wish to change the file permissions for any existing files in the sharepoint, to enable the desired access for users.
-
Select a sharepoint from the table and click on the
Delete Sharepointbutton. Then confirm the deletion.
- Important:
-
Do not click on
Save Changesat this point because the data entry fields still contain the sharepoint information, and hence the sharepoint will be re-created!
For a correct table display you may need to update the window by
clicking on the Refresh button in the toolbar. The table
listing the sharepoints can be sorted by clicking on the respective
column header.
In general, every WebShare sharepoint should also be the same as or a subset of a HELIOS volume, to ensure that files with Mac resource forks or Windows file streams get handled properly, and in order to enable Spotlight searches within that sharepoint. Use HELIOS Admin (“Volumes” in the Base manual) to define a volume (it need not be published) on each unique top level share. Lower level shares must NOT have their own (nested) volume definition. In the case that neither EtherShare nor PCShare is installed, HELIOS Admin can still be used to define volumes.
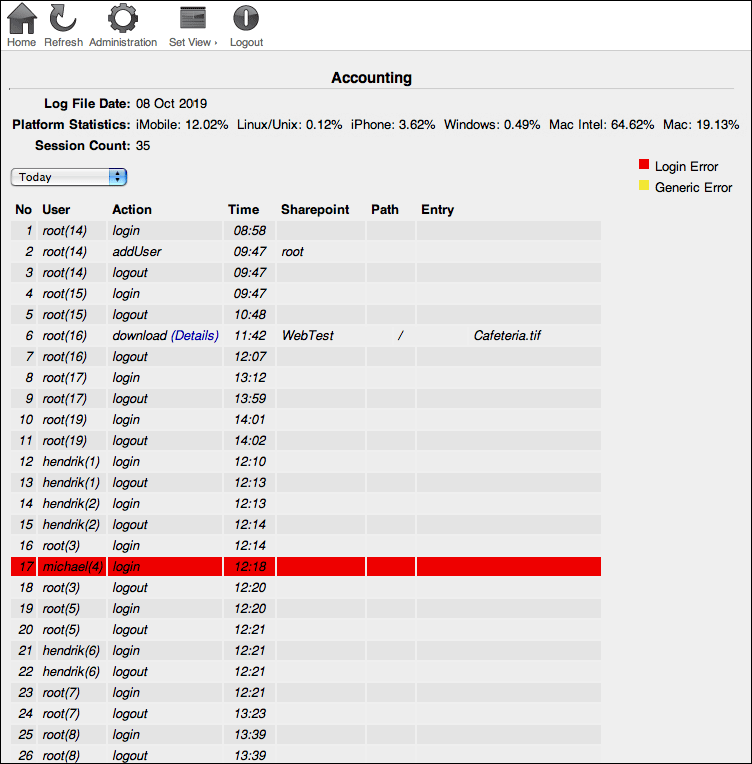
4.6 Accounting
The “Accounting” page (Fig. 4.8) lists all user actions on
the WebShare File Server. The default view displays User,
Action, Time, Sharepoint,
Path and Entry per action.
The exact WebShare status codes are detailed in C.1 “WebShare log file structure”.
By means of the pop-up menu you can choose which accounting file is displayed on the “Accounting” page. The content is taken from the files “webshare.acct” (today) to “webshare.acct.6” (seven days ago), which are stored in “HELIOSDIR/var/adm”.
By use of the toolbar item Set View you can change the
design of the list: Default (as seen in Fig. 4.8),
Extended (includes “Path”, “user agent” (browser), “OS” and
“platform” information, and states the date in the “Time”
column), and Small. A click on column headers changes the
sort order. An entry can appear with a yellow or red background.
Red is used to highlight security warnings (e.g.
login errors). Yellow is used for informational warnings
(e.g. download errors).
Detailed accounting information (Fig. 4.9) for uploaded and
downloaded archives is available when clicking on the
(Details) link.
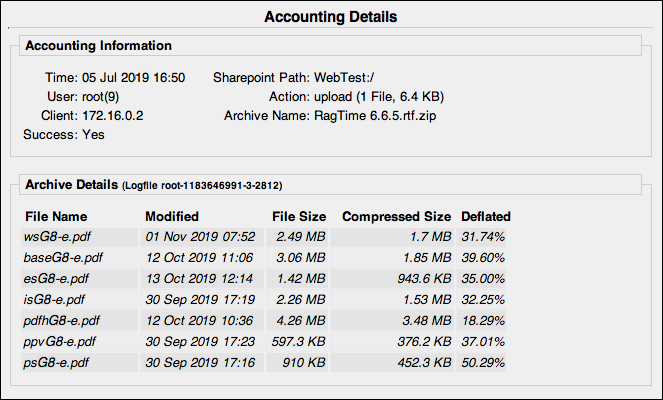
- Note:
-
Downloads from a WebShare sharepoint are always archives. Therefore every download action features the
(Details)link.
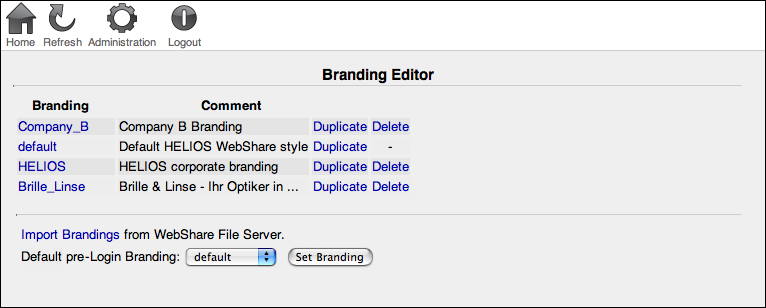
4.7 Branding Editor
WebShare features a so-called “Branding Editor”, which allows adjusting the GUI on a per client basis (Fig. 4.10). Clients can thus bring their corporate design into WebShare, which has the following advantages:
Easy GUI customizing without programming
Use of corporate designs
Enhanced customer retention
Hosting content for different clients on the same server
Icon families of different skin, color, and size included
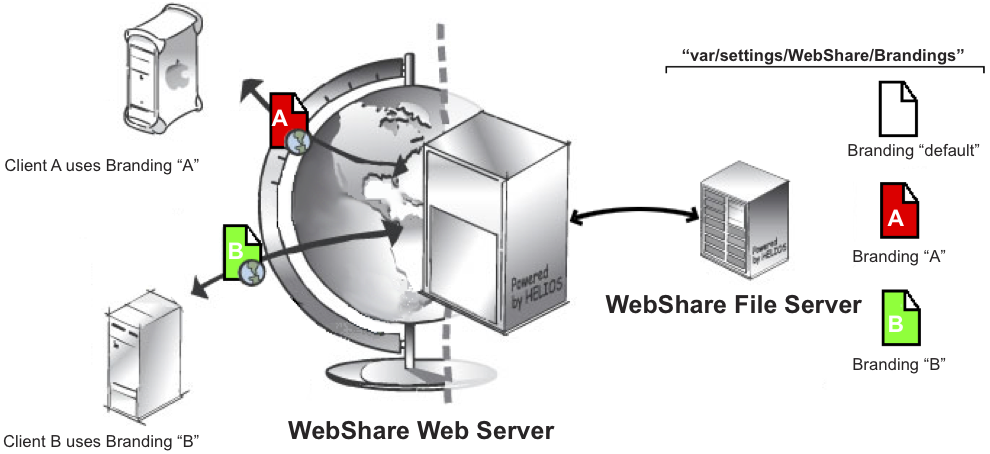
4.7.1 Create and configure brandings
All branding components are stored on the WebShare File Server in the “Settings” volume in “WebShare/Brandings/<branding name>”. You may copy images to this folder, they will then be available in the Branding Editor pop-up menus.
The WebShare “default” branding can be used as a template for custom brandings:
-
Log on to the WebShare File Server.
-
Click on the
Administrationbutton and select theBranding Editorlink.
- Note:
-
Whenever the Branding Editor is invoked for the first time after the start of the WebShare Web Server, the brandings are synchronized between the WebShare File Server and the WebShare Web Server. Therefore it can take some seconds until the “Branding Editor“ is displayed.
-
In the “default” branding line click on the
Duplicatelink, enter a name for the new branding and click on theSave Brandingbutton.
- Note:
-
Use only the characters A-Z, a-z, numbers 0-9, minus (“-”), and underscore (“_”) for the branding names.
The duplicated branding (in the example named “HELIOS”) is now listed in the “Branding Name” column. See Fig. 4.11.

Due to the duplication, the new branding initially comes with the same settings and configuration as the “default” branding. The branding can now be customized:
-
Click on the branding name link (in this case “HELIOS”) to open the editor.
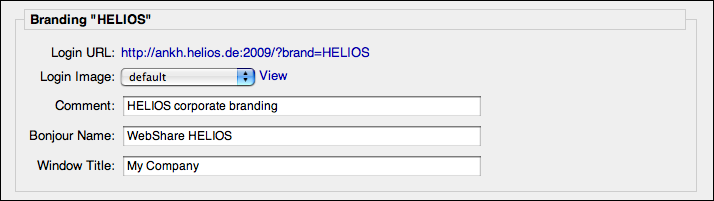
This section (Fig. 4.12) shows the
login URL, which includes the branding name and the default
for the window title (if this field is left empty, the value
“HELIOS WebShare” is assumed). If a window title is specified
in the Branding Editor, the Powered by HELIOS WebShare link
is not displayed anymore for this branding on the WebShare
start page, and when logging off from WebShare, the string
“Thank you for using HELIOS WebShare.” is replaced with your
window title value (“Thank you for using <your_value>”).
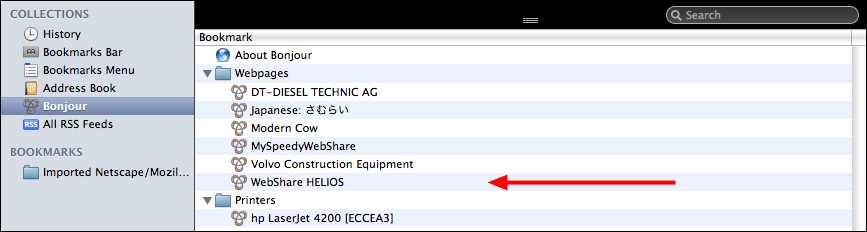
In addition, this section offers a pop-up menu to
choose a login image, a comment field, and a field to enter
a name under which the branding appears in the “Bonjour” network
environment, e.g. in Apple’s Safari browser (see arrow in
Fig. 4.13).
-
Click
Viewto open a preview of the chosen login image in a new window.
The login URL (Fig. 4.12) can be provided to users who should see and use this branding. Those users must also be assigned this same branding via the “User Administration” page (4.3 “User Administration”). Using the branding login URL ensures that the user is shown the branding login image (Fig. 4.12) and login page corresponding to that branding, even though the user has not yet logged in. Once the user logs in, the branding that has been assigned for that user via the “User Administration” page will be used.
If users navigate to the WebShare server without using their
branding login URL, they will see the login image and login
page which has been set via the Default pre-Login Branding
pop-up menu (Fig. 4.11). If a user was not assigned a branding,
once they log in, they will see the default branding defined
on the “Server Preferences” page (4.1 “Server Preferences”).
Each page in WebShare is generated as an HTML page. This section allows defining colors, background images, font family, sizes, etc. (Fig. 4.14).
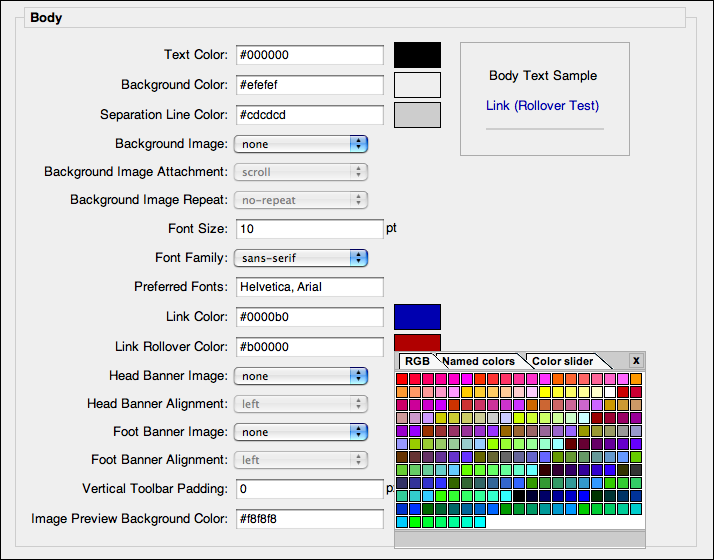
Next to each color definition field is a preview of the specified color. If you click on this square a color picker opens allowing you to pick a color. The color picker supports three modes (Fig. 4.14):
216 web-safe RGB colors
142 defined named colors
RGB color slider
(Click on preview field to apply the selected color)
All color definitions can be entered in the corresponding fields either with their name according to the HTML standard (“red”, “black”, “green”, etc.), in their hexadecimal value (e.g. #000000 for “black”) or as RGB values. You may enter “transparent” into a color definition field or leave the field empty, to assign transparency. The following table lists possible color definitions according to the CSS2 specification:
| Value | Example | Description |
|---|---|---|
| HTML color name | maroon | – |
| #rrggbb | #CC0066 | Hex 6 digits |
| #rgb | #C06 | Hex 3 digits |
| rgb(rrr, ggg, bbb) | rgb(204, 0, 102) | Decimal RGB |
| rgb(rrr%, ggg%, bbb%) | rgb(80%, 0%, 40%) | Decimal RGB in percentage notation |
| Enter “transparent” or leave empty | transparent | Transparency |
- Note:
-
RGB values, e.g. of corporate spot colors, can be determined by using color meters (e.g. Photoshop Eyedropper tool) and reading out the values from the color picker. These can then be entered in the color value text field, or “reproduced” with the color sliders of the color picker.
The “Vertical Toolbar Padding” setting only addresses Internet Explorer 6
users. It allows specifying the padding between the button
strings and the toolbar background. Of course, this setting
only applies if the toolbar alignment is set to vertical.
In this section the background colors for even and odd table rows can be defined (Fig. 4.15). It is advisable to specify background colors that contrast with each other, in order to enhance the readability of rows in larger table listings.

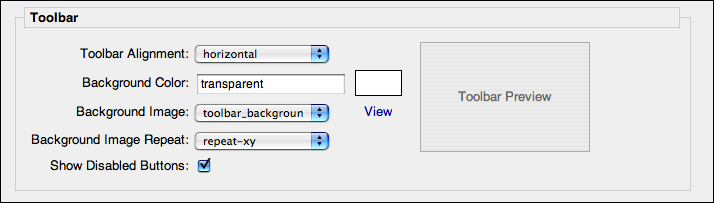
This section allows specifying the appearance of the WebShare toolbar (Fig. 4.16). The toolbar can be aligned horizontally or vertically, and a background color and a background image can be assigned to it:
-
Select from the pop-up menu whether the toolbar background image should be repeated vertically (
repeat-y), horizontally (repeat-x) or in both directions (repeat-xy). Ifno-repeatis selected, the background image is not repeated at all, i.e. it only appears once.
If the Show Disabled Buttons checkbox is active disabled buttons
and menu items appear grayed-out, else they are hidden.
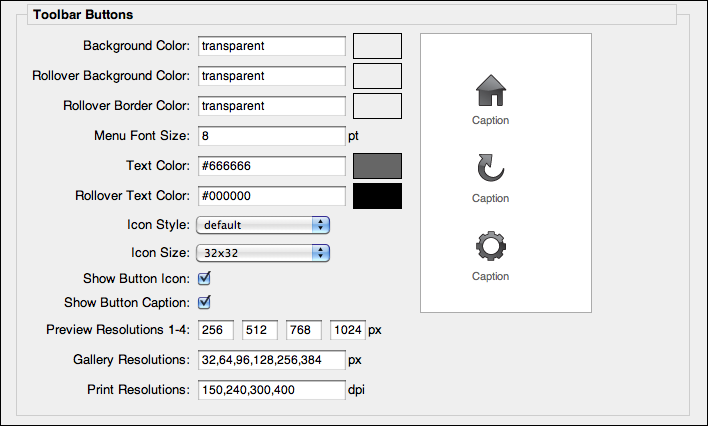
This section allows specifying the appearance of the WebShare toolbar buttons (Fig. 4.17):
Some configurable items in this section were already described above in other sections.
Icon styles and sizes can be selected from the corresponding pop-up menu.
If the Show Button Icon checkbox is not active, icons are
hidden and only the button caption is visible.
If the Show Button Caption checkbox is not active, captions
are hidden and only the button is visible.
The values specified in Preview Resolutions 1-4 are used in the
4 zoom buttons (numbered 1-4) for file previews and proofs. Default values are: “256,512,768,1024”.
The Gallery Resolutions preference is a comma-separated list of pixel
resolutions for the slider control in the gallery view. If only one value is defined the slider control
will not be displayed in the gallery view. If the value 0 is defined the gallery
view will be disabled for this branding.
This property is limited by the server preference Max. Gallery Resolution
(4.1 “Server Preferences”) which defines the maximum allowed resolution for
gallery previews. Values larger than Max. Gallery Resolution can be defined,
but the slider control will only allow resolutions up to the value defined in
Max. Gallery Resolution. The initial resolution of the gallery view is the
nearest defined value smaller than or equal to 128 pixels or to the value defined
in Max. Gallery Resolution if it is less than 128 pixels.
Default values are: “32,64,96,128,256,384”.
The Print Resolutions preference allows you to specify print resolution
values, which are available in the Resolution pop-up menu of the print
and proof print settings menu. The first four values specified for this preference
appear as Draft, Good, Excellent, and Super
Fine. All other values, starting with the fifth specified value, are displayed as
Custom 1, Custom 2, etc. (see also 6.4.7 “Preview/proof print settings”).
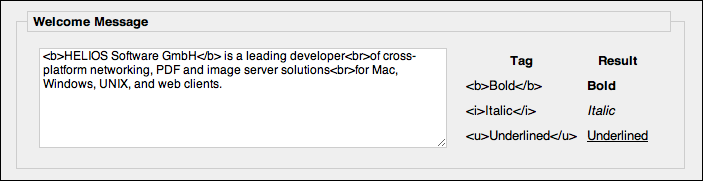
You may define a welcome message (Fig. 4.18) for the WebShare “Login” page (Fig. 4.19). HTML tags are allowed to format the text.
You may also include an image (in the example below the
HELIOS logo) in the login window. See #loginImage in
4.7.8 “Customize brandings via CSS” for details.
4.7.2 Import brandings
You may also import WebShare brandings, which have previously been created, e.g. with the Branding Editor on another WebShare server.
-
Copy the branding to “var/settings/WebShare/Brandings”.
-
Click on the “
Import Brandingsfrom WebShare File Server.” link on top of the Branding Editor.
- Note:
-
While importing brandings, the WebShare Web Server synchronizes with the WebShare File Server. Therefore it can take some seconds until the imported branding(s) appear(s) in the list.
All brandings in “var/settings/WebShare/Brandings” will be imported into the Branding Editor and are listed in the “Branding” column (Fig. 4.20; compare with Fig. 4.11).
4.7.3 Brandings and the “style” file
Each branding folder contains the file “style” which stores all branding settings. However, to back up a branding you should save the whole branding folder.
4.7.4 Add custom file icons
For a description of how to add custom file icons to WebShare see Custom icons in 4.9 “HELIOS Icon Collector”.
4.7.5 Add custom banner images
WebShare allows having custom head and foot banners per branding (see Fig. 4.14).
-
Copy the image that you want to use as banner image into the brandings folder (“WebShare > Brandings > <branding name>”).
-
On the “Branding Editor” page click the “
Import Brandingsfrom WebShare File Server.” link.
-
In the “Body” section select from the pop-up menu
Head Banner Image(orFoot Banner Image) the desired image file and confirm with theSavebutton.
4.7.6 Banner image URL mapping
You may define URL mappings for the head banner image
and the foot banner image. The following attributes are
allowed with the <area> tag:
shape="rect|circle|poly|point"
coords="x1,y1,x2,y2"
href="URL"
alt="Alternative text"*
title="Tooltip text"
target="_blank|_parent|_self|_top"**
| * | This attribute is compulsory |
| ** | Only "_blank" makes sense |
For further information on URL image mapping see:
www.w3.org/TR/html4/struct/objects.html#h-13.6
-
In the “<branding name>” folder, open “head.map” and “foot.map” respectively and replace the default content with the
<area>tag and the desired attributes.
- Example:
<area
shape="rect"
coords="0,0,68,68"
href="http://www.helios.de/"
alt="HELIOS Homepage"
title="HELIOS Homepage"
target="_blank">
- Note:
-
You may define various URL mappings. For this, arrange the
<area>tags one after the other.
-
On the “Branding Editor” page click the “
Import Brandingsfrom WebShare File Server.” link to make your changes active.
4.7.7 Add custom banner text
You may also add custom banner text which will be included above the WebShare file browser view.
-
Save your custom banner text to a file named “.wsbanner” in the desired directory, and WebShare will add this text to the file browser view.
If the “.wsbanner” file is saved to the root directory of a sharepoint, it will apply to the entire directory tree. Simple HTML tags can be used to format the text.
4.7.8 Customize brandings via CSS
If existing, the file “additional.css” in the branding folder “var/settings/WebShare/Brandings/<branding name>” will automatically be included in every WebShare server response for the corresponding branding.
As a starting point, you can use the example file “additional_samples.css”. By default, it is copied to “var/settings/WebShare/Brandings/default” during the WebShare installation. It lists ID and class names for GUI components, e.g. buttons and tables used in WebShare, and some CSS examples for customizing a branding.
Do the following to customize a branding:
-
Copy “additional_samples.css” to the desired branding subfolder and edit it, or create a new UTF-8 encoded text file. In any way, save it as “additional.css”.
-
Add custom style definitions to this file.
-
On the WebShare “Branding Editor” page click on the “
Import Brandingsfrom WebShare File Server.” link.
Changes become visible immediately after the import, for all sessions that use the modified branding.
Use mouse over effect (table row background color) in the file browser:
   .fbTable tr:hover td {
       background-color: #CDF;
   }
Hide the border of file items in gallery view and show it on mouse over:
   .fbGalleryView .fileItem {
       border: 1px solid transparent;
   }
   .fbGalleryView .fileItem:hover {
       border: 1px solid #AAA;
   }
Align images vertically centered in gallery view:
   .fbGalleryView .imageCell {
       vertical-align: middle;
       display: table-cell !important;
   }
Add a black border and a checkerboard background to the image in proof mode (the PNG image must be available in the respective branding folder):
   #screenProofImage {
       border: 1px solid #000;
       background: url(checkerboard.png) repeat;
   }
Hide the Administration toolbar button (Important:
This does NOT disable the administration, only the accessibility from the toolbar!):
   #tbBAdministration {
       display: none;
   }
Apply red and bolded text style to the Logout toolbar button caption:
   #tbBLogout span {
       font-weight: bold;
       color: red;
   }
Include an image to the login page, as seen in Fig. 4.19:
   #loginImage {
       background: transparent url(helios.png) no-repeat scroll 50%;
       height: 130px;
       width: 100%;
   }
For more examples and detailed information about used CSS IDs and class names in WebShare, see the file “additonal_samples.css” in the respective branding folder. For further information about Cascading Style Sheets refer to: www.w3.org/Style/CSS/.
4.7.9 Customize brandings via JavaScript
If existing, the file “additional.js” in the branding folder “var/settings/WebShare/Brandings/<branding name>” will automatically be included in every WebShare server response for the corresponding branding.
As a starting point, you can use the example file “additional_samples.js”. By default, it is copied to “var/settings/WebShare/Brandings/default” during the WebShare installation. It contains information and examples about using JavaScript to customize the behavior and adding custom functionalities to a WebShare branding.
Do the following to customize a branding via JavaScript:
-
Copy “additional_samples.js” to the desired branding subfolder and edit it, or create a new UTF-8 encoded text file and add custom JavaScript code to this file. In any way, save it as or rename it to “additional.js”.
-
On the WebShare “Branding Editor” page click on the “
Import Brandingsfrom WebShare File Server.” link.
The script becomes active immediately after the import, for all sessions that use the modified branding.
4.7.10 Custom toolbar icons
It is possible to replace the toolbar icons that are shipped with WebShare with your custom icons:
-
Create your custom icon files in one or more of the sizes, specified in the
Icon Sizepop-up menu in the “Toolbar Buttons” section (compare Fig. 4.17), and save them in PNG, GIF or JPEG format. Make sure that the icon files have the extension .png, .gif, .jpeg or .jpg.
The custom icon files must have the same base name as the icons that you wish to replace, e.g. to replace the toolbar icon “copy.png” your custom icon must be named “copy.png”, “copy.gif” or “copy.jpg”. Please do not forget to also replace the corresponding rollover icons which always have “_active” appended to their name, e.g. “copy_active.png”.
The icons shipped with WebShare are stored in “var/settings/WebShare/Brandings/default/icons”.- Note:
-
Custom icons can be smaller than the original icons. Larger custom icon files will be clipped.
-
Copy the icons into the “icons” subfolder of “var/settings/WebShare/Brandings/<branding name>”.
-
On the WebShare “Branding Editor” page click on the “
Import Brandingsfrom WebShare File Server.” link.
The custom toolbar icons should now have replaced the corresponding icons that were selected in the “Toolbar Buttons” section.
4.7.11 Custom actions icons
It is also possible to add custom icons to those action scripts that are
available in the toolbar Actions > menu (see Actions >
in 6.3.1 “The WebShare toolbar”). These icons must be of the PNG format:
-
Copy the icon into the “actions” subfolder (create if necessary) of “var/settings/WebShare/Brandings/<branding name>”. The custom icon must have the same name as the action script that you wish to assign the icon to, e.g. name the icon “wssendmsg.png” if you want to assign this icon to the script “wssendmsg.pl”.
-
On the WebShare “Branding Editor” page click on the “
Import Brandingsfrom WebShare File Server.” link. The action in theActions >menu should now have an associated icon.
4.8 Java Server Statistics
The “Java Server Statistics” page (Fig. 4.21) is organized
in three sections: WebShare Server Information,
WebShare Java Information, and WebShare User Statistics.
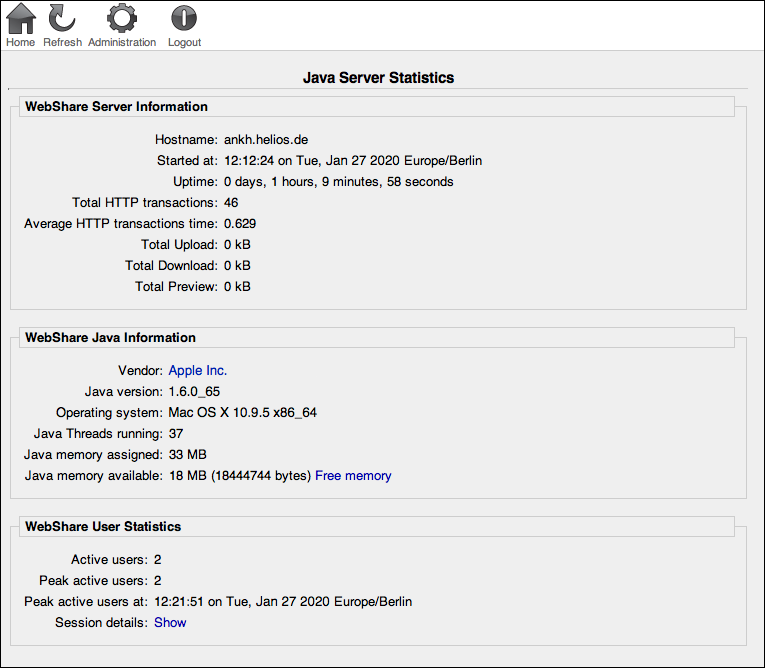
4.8.1 WebShare Server Information
This section contains general information about the WebShare Web Server, such as the host name, the server start time, the uptime, the number of HTTP transactions and the average time per HTTP transaction, i.e. the elapsed time between HTTP request and response. In addition, the total amounts of uploaded, downloaded and previewed data are displayed.
4.8.2 WebShare Java Information
Provides information on the hardware vendor, the OS, the
Java version, the number of active Java threads, and
the assigned and available memory. Clicking on the Free memory
link frees allocated memory that is currently unused.
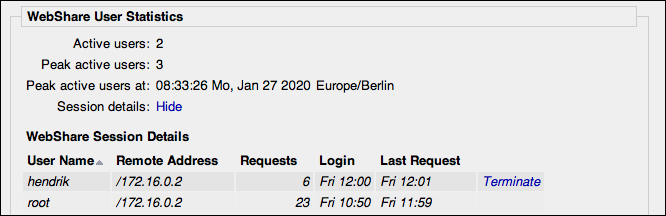
4.8.3 WebShare User Statistics
Provides information about currently active and peak active
users. You can view session details
by clicking on the Session details: Show link. In addition, all
sessions, except for the user’s own session, can be terminated
by clicking on the Terminate link (Fig. 4.22). A click on the
Session details: Hide link closes the session details view.
4.9 HELIOS Icon Collector
HELIOS Icon Collector collects all file icons from a Windows or Mac client, to make them available to the WebShare File Server for use in the file browser.
4.9.1 Icon Collector (Windows)
On Windows, document types and programs are detected by the Registry.
The HELIOS Icon Collector is available on the “HELIOS Applications” volume:
-
Mount the “HELIOS Applications” volume and open the “Windows > WebShare Tools” folder. Double-click the “HELIOS Icon Collector.exe” program icon.
4.9.2 Icon Collector (OS X)
On Mac, file and program icons are usually located in an Application bundle in the “Applications” folder.
The HELIOS Icon Collector is available in the “HELIOS Applications” volume:
-
Mount the “HELIOS Applications” volume and open the “MacOS > WebShare Tools” folder. Double-click the “HELIOS Icon Collector” program icon.
-
If desired, change the icon search path using the
Search icons in:field.
4.9.3 Usage
-
In the
Save Icons in:field specify the path to the destination folder, where the icons are stored in the HELIOS native “.wsr” format or select it using theBrowsebutton (Fig. 4.23).
- Important:
-
The destination folder must already exist!

-
Click the
Startbutton.
The progress is shown in the window (Fig. 4.24).
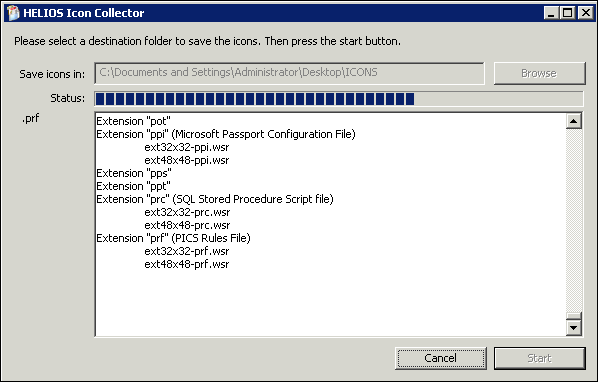
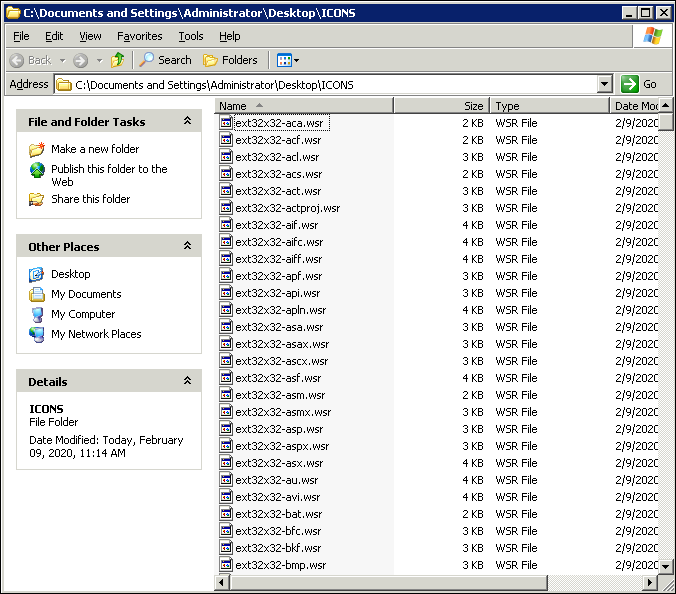
The process is complete when the progress bar has reached the end. Now all available file icons are stored in the “.wsr” format in the destination folder (Fig. 4.25).
The collecting of file icons can be repeated whenever new icons are added to the source workstation.
To display a “.wsr” file you can drag it in the HELIOS Icon Collector program window.
-
Now copy all files to “WebShare/Icons” in the “Settings” volume on the WebShare File Server.
Custom icons can also be copied to the destination folder. They must have the size 32x32, 48x48 or 64x64 and be in the PNG format.
Icon names must follow a certain syntax:
Icon by file extension
ext<size>-<extension>
Icon by file type & creator
type&creator<size>-<type(hex)>-<creator(hex)>
Icon by type
type<size>-<type(hex)>
- Examples:
Sound file icon of the size 64x64 with extension “.wav”:
ext64x64-wav.png
Flash Player icon of the size 32x32 with type “APPL” and extension “SWF2”:
type&creator32x32-4150504c-53574632.png
JPEG file icon of the size 48x48 with type “JPEG”:
type48x48-4a504547.png
4.10 WebShare URL Share Access
WebShare URL Share Access can be used for customer convenience, to offer direct access to relevant content. Or, it can be used as part of a variable data or personalized URL system. WebShare URL Share Access offers a very powerful technology to integrate WebShare features or content into third-party or custom applications.
It allows sharing document previews or directory
listings from within any text document, e-mail or web
application. Single images can be referenced from HTML
in the src attribute of an <img>
tag or the data attribute of an <object> tag.
The URL Share Access feature also allows sharing documents
without permitting the user to navigate out of the document preview. If the
URL Document Preview only checkbox is activated in the user configuration,
the user can only access WebShare by a URL Share Access link that points to a
particular document. This allows presenting PDFs and images quickly and easily without any
session setup. Further customization can be done by use of additional banners. A much simpler
toolbar menu will be presented in this view. Whenever possible, a Close button is
additionally displayed (see Fig. 4.26 below).
4.10.1 Required parameter
The file server you wish to connect to, e.g.:
server=localhost
4.10.2 Login parameters
The user name you wish to log in with, e.g.:
user=webshareuser
The password for the user to log in with. If the password is omitted
the user will be prompted to enter the password.
password=websharepassword
- Note:
-
To specify the
passwordparameter, theuserparameter must also be specified.The
po(preview only for URL Share Access) flag can be specified in the user configuration file (see 8.1 “User configuration file”) to limit a user to URL access only. This avoids that this particular user can be abused for interactive logins.
4.10.3 Path parameters
The sharepoint name, e.g.:
share=SampleImages
The path to a file or folder, e.g.:
path=template-images%25%30/TIFF
4.10.4 Image parameters
If the path parameter is set and points to an image file, the following
parameters can be appended:
Specify h or horizontal for flipping
the image horizontally, v or vertical
for flipping the image vertically. hv or vh
or both flips the image horizontally and vertically. Omit this
parameter or specify none for not flipping the image at all.
Specify 90, 180 or 270 to rotate
the image by the specified degrees. Omit this parameter or specify
none or 0 for not rotating the image.
Specify any dpi or pixel value, e.g.: zoom=512pixel or zoom=72dpi
You may also specify comma-separated values, which are
taken as x/y pixels, e.g: zoom=512,512
If the path parameter is set and points to a multiple-page document
the following parameters can additionally be specified:
Specify the desired page number of the document, e.g.: page=3
4.10.5 Response parameter
If the path parameter is set and points to an image file, you may
want to fetch the image only. The following parameter can be used
to embed images in an HTML page, e.g.: <img src="[LINK_SHARE_URL]>"/>
Specify true or 1 to generate a response that does just
contain the requested image. Omit this parameter to get a complete WebShare
session.
- Important:
-
If the
image-onlyoption is used PrintPreview needs to be installed on the host. Otherwise an error message is issued (“501 – Not implemented”)!
4.10.6 Image only parameters
Optional parameters if image-only is set to true or 1:
Specify either jpg or png or tiff or
pdf or jp2 to convert the
requested image to an other file type, e.g.: image-type=pdf
Specify the name of the ICC profile that should be applied
to the image. Omit this parameter to receive the original
image or specify the string none to have the sRGB profile
applied, e.g.: profile=MatchPrintS%201.0%20UCR-370
Any profile listed in the Default Simulation Profile pop-up menu
(see Fig. 6.26), or available in the HELIOS “ICC-Profiles” volume can be used
as a profile name.
Specify the name of a monitor profile that should be applied to the image.
As a profile name any profile listed in the Default Monitor Profile
pop-up (see Fig. 6.26) can be used, e.g.: monitor-profile=iMac%20Calibrated.icc
If the profile parameter is set to a valid ICC profile
name, you may define proof color options:
Specify a comma-separated list of indices of each ink color
that should be visible. For details refer to FilterInks option
of the “layout” command (see HELIOS ImageServer manual), e.g.: filter-inks=2,3,4
4.10.7 Preview page parameters
Optional parameters if image-only is set to false or 0
and the path parameter points to a multiple-page document:
Specify the number of columns that should be used for the
document preview, e.g.: cols=2
Specify the number of rows that should be used for the
document preview, e.g.: rows=4
Specify true or 1 to enable facing
pages mode. Omit this parameter or set it to false if you
do not wish facing pages.
Specify true, if page breaks should be hidden.
Omit this parameter or set it to false if page breaks
should be displayed.
4.10.8 Examples
All parameters must be properly escaped (e.g. “%20” for escaping the space character).
- Example 1:
Logged in as user “heliosuser” (password: “demo”) and previewing page 3 of the file “Layout.xpv” in the subdirectory “xpv_images” of the sharepoint “Sample Images”. The size is 256 pixel, rotated 90° clockwise and arranged in 2 rows and 2 columns while the pages are facing, with page breaks hidden:
http://ankh.helios.de:2009/app/webshare.woa/wa/linkShare?
server=localhost
&user=heliosuser
&password=demo
&share=Sample%20Images
&path=xpv_images/Layout.xpv
&rotate=90
&cols=2
&rows=2
&facing-pages=true
&zoom=256pixel
&page=3
&no-page-breaks=true
- Example 2:
Logged in as user “heliosuser” (password: “demo”) and accessing the “default” directory in the sharepoint “Brandings”:
http://ankh.helios.de:2009/app/webshare.woa/wa/linkShare?
server=localhost
&user=heliosuser
&password=demo
&share=Brandings
&path=default
- Example 3:
Logged in as user “heliosuser” (password: “demo”) the response to the request will only be the image “Cafeteria-RGB.tif”. This allows embedding an image in a web page:
http://ankh.helios.de:2009/app/webshare.woa/wa/linkShare?
server=localhost
&user=heliosuser
&password=demo
&share=Demo
&path=SampleImages/TIFF/Cafeteria-RGB.tif
&image-only=1
In addition, an ICC profile may be applied to the image, and the image format can be converted to PDF:
http://ankh.helios.de:2009/app/webshare.woa/wa/linkShare?
server=localhost
&user=heliosuser
&password=demo
&share=Demo
&path=SampleImages/TIFF/Cafeteria-RGB.tif
&image-only=1
&profile=MatchPrintS%201.0%20UCR-370
&image-type=pdf
4.10.9 URL Share Access Helper
“URL Share Access Helper” is a convenient tool to generate URL Share Access links without the need to specify each desired parameter in the web browser’s URL address bar.
-
Mount the “HELIOS Applications” volume and open the HTML file “UrlShareAccessHelper.html” from the “Documentation” folder in a web browser.
-
Fill in the form fields according to your needs and finally click on
Generate Link.
The generated link can be clicked in order to log in to WebShare with the specified parameters.
4.10.10 Security considerations
You should give some thoughts about the security when using WebShare URL Share Access:
Access data (user name and password) are stated in cleartext in the browser address bar
The option
image-only=1can be deleted from the browser address bar in order to receive a complete session
You can do the following to reduce the security risk:
Establish a special user who is used for URL Share Access only
Use a user who has document preview-only access (
URL Document Preview onlyoption)Only allow that user to access specific sharepoints. Set all other sharepoints to deny that user access (
Allowed Users,Allowed Groupsin the “Sharepoint Administration” dialog).Establish read-only permissions for the sharepoint
4.11 WebShare catalog presentation
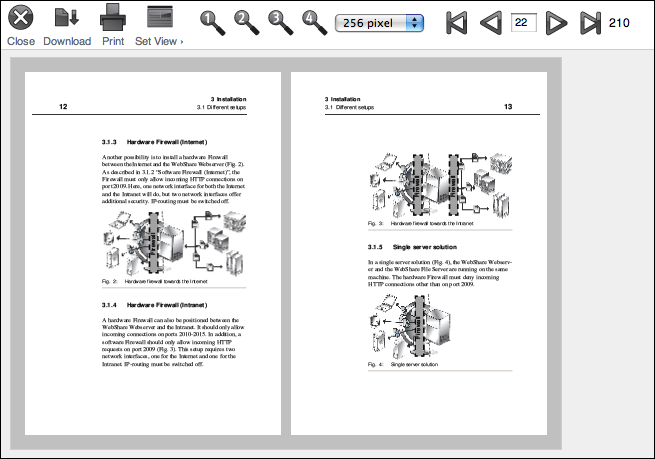
The WebShare catalog presentation allows presenting a multiple-page PDF document, to be displayed in a web browser with a simplified user interface. WebShare options such as Login, Sharepoints, Administration are invisible and therefore unavailable for the user. Depending on the permissions, the user can view a PDF document in multiple zooming steps, switch between pages, print the current document view, and download the document. This makes it very easy to provide versions of a PDF catalog. Remote users simply click on a given URL, which then opens the catalog presentation.
The WebShare catalog presentation uses the URL Share Access feature (see 4.10 “WebShare URL Share Access”). “UrlShareAccessHelper.html”, an HTML page, which is available in the “HELIOS Applications” volume, helps generate a static URL that can be used for remote users to access the catalog presentation. The remote user is in a kind of sandbox and does not see other WebShare options, only the PDF file will be presented.
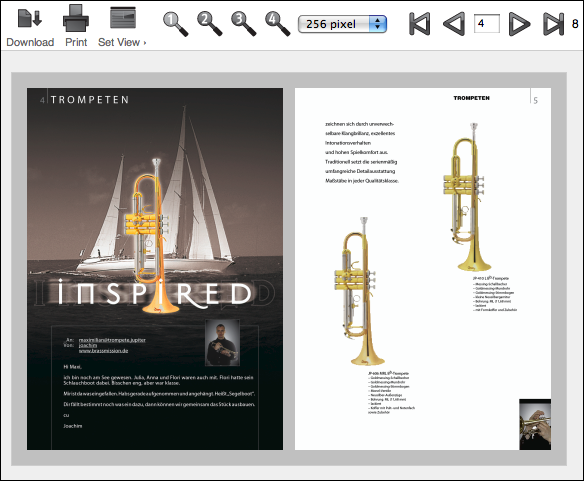
The catalog presentation interface can also be customized by using a custom branding. Additional HTML banner and trailer files allow placing some additional text information on the top and bottom of the PDF document, e.g. advertisements and other important information.
Steps to set up the WebShare catalog presentation:
-
Create a new user or use an existing one that should be the user which runs for all catalog clients. Check the
URL Document Preview onlyoption for this user. This means that the user cannot login interactively, this user is forced to run the simplified presentation mode only.
-
Open the “UrlShareAccessHelper.html” file in a browser. Specify the server, username, file path, etc. settings (check 4.10 “WebShare URL Share Access” for details).
-
Customize a branding and assign this branding to the user you created in “Step1” (see 4.3 “User Administration”).
-
Add an HTML banner and trailer file. These HTML files must be in the same directory where the PDF file is stored. The HTML banner uses the document name with the suffix “.banner”, e.g. “Document1.pdf.banner”, the trailer HTML uses the suffix “.trailer”, e.g. “Document1.pdf.trailer”.
Distribute the generated URL to remote users who should be allowed access to this document. Depending on the access rights, they may also download the document. It is very easy for remote catalog users because they do not need any user credentials, nor do they see any other WebShare data.
This feature allows making this print catalog quickly available to remote users, reducing printing and making intermediate versions available via WebShare catalog presentations only.
4.12 Troubleshooting
Wrong Java version on WebShare Web Server
The WebShare Web Server needs Java 6 or newer (64-bit). Older versions produce some “Class not found” errors, which do not identify the problem.
- Solution:
Install a newer Java version for your WebShare Web Server.
Please make sure that Java is found when “start-helios” is issued. A symbolic link from your Java runtime to “/usr/bin/java” could be a solution. The Java version can be verified with the command:
# java -version
java version "1.6.0_38"
Java(TM) SE Runtime Environment (build 1.6.0_38-b05)
Java HotSpot(TM) Client VM (build 20.13-b02, mixed mode, sharing)
Custom file icons do not appear after an upload
Many browsers only support the data fork for the upload. This means that additional information like a custom icon, the correct Type & Creator, etc. gets lost during the upload.
- Solution:
Create a Zip archive using the OS X Finder Zip utilities, which will include all metadata and WebShare will correctly unpack it on the server. A second benefit is that Zip archives are smaller.
- Note:
-
Custom icon support requires EtherShare or PCShare.
Uploading file names with special characters contain wrong file names after the upload
All major browsers support UTF-8 web pages, unfortunately some fail to accept/preserve file names in upload forms with umlauts, etc.
- Solution:
Create a Zip archive and upload the archive. OS X Finder Zip and Windows Zip include correct file names which will be unpacked correctly on the server by WebShare.
No icons after file upload in WebShare sharepoint window
Files are displayed with a generic icon instead of the application or document icon in the sharepoint window.
- Solution:
First, verify that the sharepoint corresponds to or is contained within a HELIOS volume. See 4.5 “Sharepoint Administration”.
Then use the HELIOS Icon Collector (4.9 “HELIOS Icon Collector”) to collect the icons on a client and copy them to the WebShare server.
Missing response for long directory listings
If a long directory listing is requested (e.g. more than 4000 files) and no response is received by the client this can be caused by a memory bottleneck. Check the “websharewoa.log” file in “HELIOSDIR/var/adm” for a message like the following WebObjects error message:
[2007-11-07 09:00:14 CET] <WorkerThread3> <WOWorkerThread id=3
socket=null>
Throwable occurred: java.lang.OutOfMemoryError
- Solution:
Allocate more memory to the “websharewoa” process by using the preference:
# prefvalue -k Programs/websharewoa/JavaOptions -t strlist
  -- "-Xms[MIN_SIZE_IN_MB]m,-Xmx[MAX_SIZE_IN_MB]m"
MIN_SIZE_IN_MBspecifies the initial size of the Java memory allocation pool, whileMAX_SIZE_IN_MBspecifies the maximum size of the Java memory allocation pool.MIN_SIZE_IN_MBmust be greater than 1 MB,MAX_SIZE_IN_MBmust be greater than 2 MB, e.g.:# prefvalue -k Programs/websharewoa/JavaOptions -t strlist -- "-Xms32m,-Xmx512m"
Default for
MIN_SIZE_IN_MB: “32m”; forMAX_SIZE_IN_MB: “128m”.
WebShare login with “WebShare File Server” set to “localhost” can fail
If an error message like: Cannot connect to server:
java.io.IOException: Socket connect to localhost failed,
error: Connection refused
is returned, the server is set up to use IPv6.
- Solution:
Instead of using “localhost” you can use either the IPv4 number of “localhost” (127.0.0.1), the real host name of the server (e.g. “mywebshareserver”) or with its DNS name (e.g. “mywebshareserver.mycompany.com”).
Another option would be to specify “WSHostName” for the WebShareWOA server, so that the “WebShare File Server” field contains that name by default, instead of “localhost”.
You can set this preference by means of the “prefvalue” command:
# cd /usr/local/helios
# bin/prefvalue -k 'Programs/websharewoa/WSHostName' -t str
  "mywebshareserver"
Thereafter, a stop/start of “websharewoa” is required to activate that change:
# bin/srvutil stop  websharewoa
# bin/srvutil start websharewoa
Another option could be to specify a Java preference so that the Java engine does prefer the IPv4 stack:
# bin/prefvalue -k
  'Programs/websharewoa/java.net.preferIPv4Stack' -t bool TRUE
Again, a stop/start of “websharewoa” is required to activate that change.
4.12.1 Limitations
Due to internal limits, WebShare cannot select more than 4096 items, for deleting, downloading, etc.
- Solution A:
Select a parent folder.
- Solution B:
Select smaller chunks.