18 The HELIOS Update Installer
18.1 About HELIOS updates
HELIOS Software GmbH offers several options to keep your HELIOS software current. There are options for both product updates and upgrades.
Updates include bug fixes, 3rd party compatibility patches, and product enhancements, and are released on an on-going as-needed basis. Updates are available for download from the HELIOS support website to authorized users.
HELIOS products include free updates (not version upgrades) for a 30 day period after purchase. Thereafter, updates are available to those who subscribe to one of the three HELIOS Update/Upgrade options, SE001, SE002 or SE003.
Upgrades are major new product versions and are only available via CD. Upgrades are automatically sent to customers with current SE002 contracts, for the covered product, at no additional charge. Further information about these “Software Upgrade Service” options is available from your reseller.
Available for EtherShare, PCShare, Base Windows, WebShare, ImageServer, PDF HandShake, and PrintPreview
Duration one year, without automatic renewal
SE001 provides web-only access to updates for your current version, of the covered product. It can be purchased for any products at any time. Upgrades to a new version are not included.
Can be purchased within 30 days after initial purchase
Available for EtherShare, PCShare, Base Windows, WebShare, ImageServer, PDF HandShake, and PrintPreview
Duration one year, with automatic renewal
Product SE002 allows access to the HELIOS update download area on the internet, and it lets the customer receive upgrades on new distribution CDs free of charge.
- Note:
-
The “Software Upgrade Service Agreement” can only be purchased within 30 days of purchase of the license you are registering. Each Software Upgrade Service covers only one product (e.g. If you have an EtherShare and an ImageServer, you will need two Service Agreements).
SE002 Service Agreement is required
Can be purchased anytime
Available for EtherShare, PCShare, WebShare, and Base Windows (for other products SE002 is recommended)
SE003 allows switching to a backup server hardware. The agreement is available for base products only (EtherShare, PCShare, WebShare, and Base Windows).
SE003 is an option for the SE002 software upgrade service and includes additional back-up for the base license and all its user expansions. Back-up for optional HELIOS add-ons (e.g. ImageServer, PDF HandShake, PrintPreview) is covered, too. Separate standard software update service agreements for ImageServer, PDF HandShake, and PrintPreview are recommended.
Customers not taking part in the update or upgrade service will only receive product updates (but not version upgrades) within 30 days after the software purchase. Customers can still upgrade their software when new major releases become available, by paying the appropriate upgrade fee. HELIOS will inform all customers who do not have an upgrade service contract about fees for upgrading existing installations as soon as new releases become available.
For both update service products contact your supplier for price information and for a copy of the relevant application form or visit the HELIOS website (www.helios.de).
18.2 Using the HELIOS Update Installer
To view a list of all HELIOS modules and their update
levels, log on to HELIOS Admin as a user with “SysAdm”
privileges, and select Versions on the Lists menu.
- Note:
-
If you need information about a certain update or update level, please check the distribution CD or the HELIOS website: www.helios.de.
Alternatively, if the HELIOS services are already running on your server you can use the “uwhat” utility (see 8.22 “uwhat”) to get information about the current update level of the HELIOS modules. For example, the entry “afpsrv 5.0.0uXYZ” indicates that the HELIOS update u0XYZ is already installed.
“uwhat” does not display updates in the way the HELIOS
Update Installer does. Thus, it is more reliable to use the
HELIOS Update Installer (options List Updates and
List History) for precise information about the
update level on your server. The HELIOS Update Installer is
described below.
New HELIOS updates are included in every new distribution
CD and can also be downloaded by authorized
users from the HELIOS web server. If you receive a new
CD and want to add the updates to your HELIOS
installation, check the /updates directory on the CD
for the update program files, and the support section on the
HELIOS website for detailed descriptions of the updates.
For update installations, we strongly recommend to use our update installer. The tool is able to find and install all updates that are required for a particular product and to check interdependencies of certain updates. The installer is easy to handle and can also be used to retrieve information about updates or to uninstall a particular update, if required.

-
To start the HELIOS Update Installer (Fig. 18.1), open a shell and enter the following command:
# cd /usr/local/helios
# bin/hupd
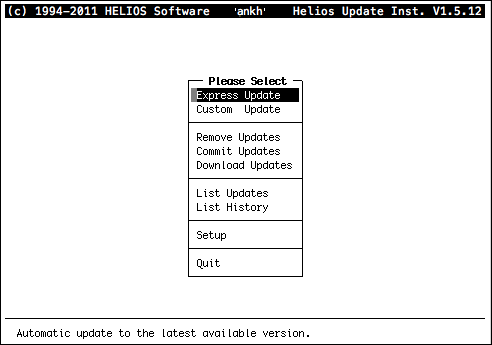
The items in the main menu can be selected by typing the
first letter. E.g. typing “s” will highlight the Setup
item.
For detailed information on navigating within the HELIOS Update Installer read the instructions in 4.1.6 “Navigating within the HELIOS Installer”. Operating the HELIOS Update Installer is almost the same as operating the HELIOS Installer.
The ESC key (Ctrl-X) always lets you return to the start-up window and the main menu.
The HELIOS Update Installer offers eight different options in its main menu (Fig. 18.1):
Express Updatewill induce the installer to automatically perform the installation of all available updates for all installed products.Custom Updatelets you select the updates you want to install.Remove Updatesallows you to uninstall certain updates.Commit Updatesremoves backup files and makes updates permanent. Usually, if you install an update, a backup file of the old version is kept. This allows you to uninstall the update in case of problems and to return to your initial installation. If new updates work fine you may want to remove the backup files. This can be achieved by using theCommit Updatesoption.Download Updateslets you download the required updates from the HELIOS Update Server via the Internet.List Updateslets you list all available updates, and can also be used to display the update info texts that describe the purpose of the respective updates.List Historygives information about the date of previous update installations. The list tells you who did what, and when they did it.Setupallows you to set preferences, e.g. change the language setting or change the search path. The latter can be necessary if you move the update files to another directory or if you have the CD and additional update repositories.
The HELIOS Update Server settings allow you to define a download path, and enter serial numbers.
Note that the HELIOS Update Installer does not automatically
stop the HELIOS services, because this is usually not
required. However, to avoid problems, we recommend to
stop all printer queues before starting to install updates and
to stop and restart the HELIOS services (commands
“stop-helios” and “start-helios”, respectively) some time
after the update installation to make the newly installed
modules available. You must stop the HELIOS services
before you select the Commit Updates option. Otherwise,
serious problems can arise.
To install new updates, you should always open the General setup dialog first and check whether the update search path is correct (Fig. 18.2).
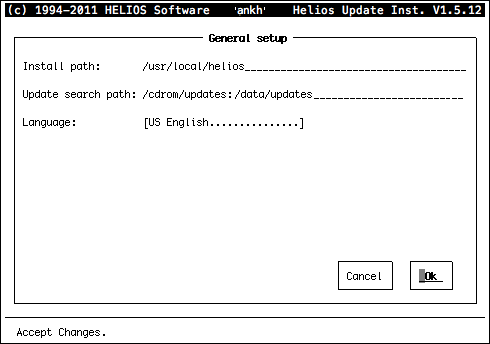
If you have to replace the path entry, use the BACKSPACE key to delete the old one. You can enter several search paths at a time, in case you have different updates repositories. In Fig. 18.2, for example, we have defined two search paths which are separated by a “:”.
The HELIOS Update Server Setup dialog (Fig. 18.3) lets
you specify a path (Download path) where the downloaded
updates are saved. Additionally you are asked for the name
of the HTTP Proxy server you want to use, and its port
number. In the Serial Numbers section enter the code of
each product for accessing the HELIOS Update Server.
- Note:
-
If invalid (or no) serial numbers are entered, only the update descriptions can be downloaded, but not the updates themselves.
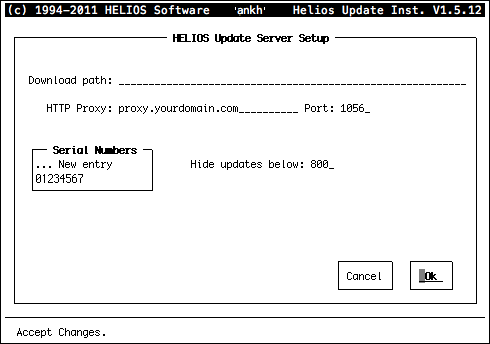
Your current update level can optionally be entered in the
Hide updates below field so that only newer updates are
downloaded.
- Important:
-
Do not specify a larger number because interdependencies need to be checked!
The List Updates window lists all updates and indicates the
state of each update.
This means, you get information if an update is applied,
already superseded or not installed. If you select an update
from the list and press ENTER, the HELIOS Update Installer will
display the corresponding description:

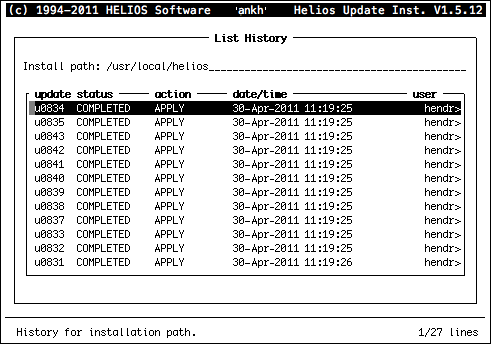
The List History window (Fig. 18.5) reveals the product
update history for the specified path.
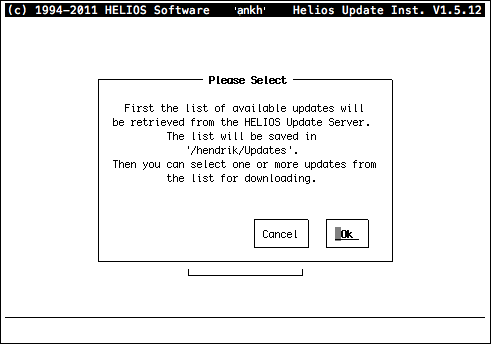
To download updates from the HELIOS Update Server via the Internet proceed as follows:
-
Select the
Download Updatesitem and confirm the dialog box that appears first with (Fig. 18.6).
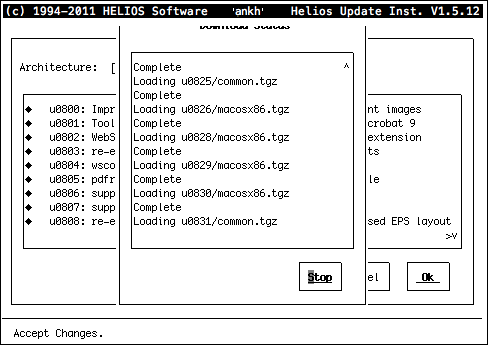
A Download Status list, which appears upon confirmation
of the preceding dialog, shows the progress of the update
loading process (Fig. 18.7) and disappears
automatically when the loading has been completed.
At this point, update description files have been downloaded to the specified directory. Next, relevant updates for each product are displayed, and can be selected for download.
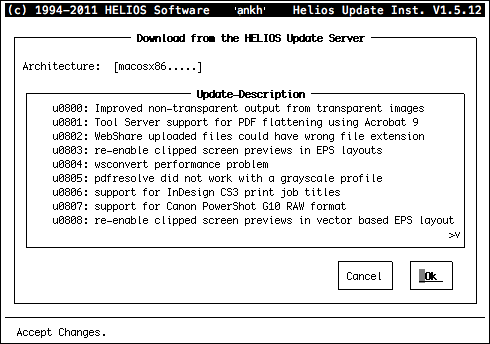
In the Download from the HELIOS Update Server dialog
(Fig. 18.8) select the architecture your host uses
and the updates you wish to apply.
-
To select the desired product and architecture, move to the appropriate field, and press RETURN to display a list of options. Select the desired option, and press RETURN.
-
In the
Update-Descriptionsection select and mark the update for download according to the instructions given in Custom Update. You can mark more than one update at a time. Then confirm your selection withOk.
As soon as the download is complete, an Information box
appears, which states the number of updates and the directory where
they have been saved to.
- Note:
-
The HELIOS Update Installer uses the standard HTTP port (80) or if configured the proxy server port number for downloading updates from the server.
This information may be important if you set up a firewall on your system.
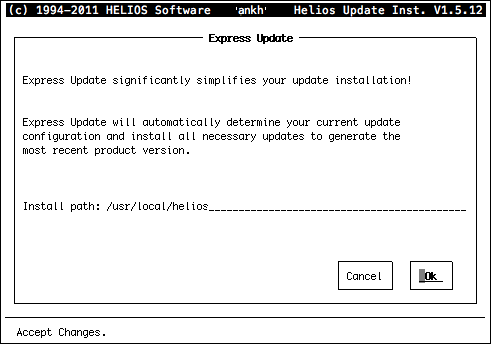
The easiest way of installing updates is to use the
Express Update option (Fig. 18.9). The correct
Install path is detected automatically by the
HELIOS Update Installer. The installation will be performed
automatically when you confirm with the Ok button.
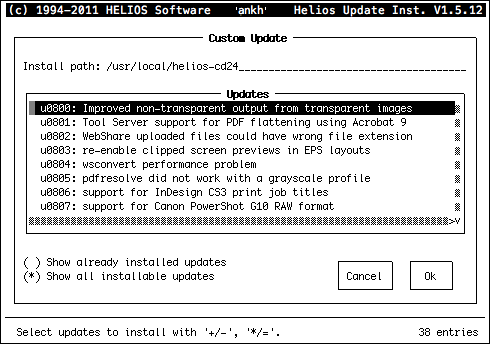
In contrast to the Express Update item you do not just select
the Install path entry, but each single update you want to
install (Fig. 18.10). The correct Install path is detected
automatically by the HELIOS Update Installer. However, it
is possible to overwrite the path entry.
-
To obtain more information on the specific updates highlight an update in the
Updatessection and press ENTER. To mark an update for installation highlight it and use the following keys to select/deselect updates for installation or removal. See also the bottom line of the dialog (Fig. 18.10):+ Select one item and move to the next
- Deselect one item and move to next
* Select all items
0 Deselect all items
 (Space Bar) Select/deselect one item
! Select/deselect one item exclusively
As soon as the installation is complete, you will be notified that all updates have been successfully installed.
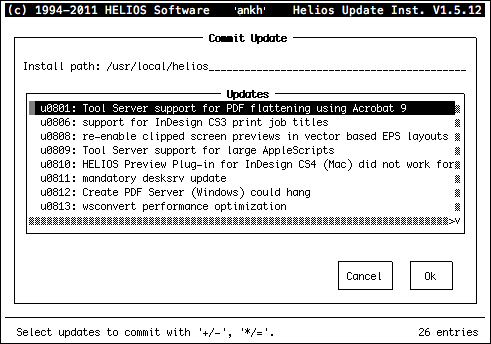
Commit Updates removes previous update versions.
“stop-helios” and “start-helios” should have been issued
since updates were installed the last time. If in doubt, issue
“stop-helios” and “start-helios” before committing updates.
-
In the
Updatessection of theCommit Updatedialog (Fig. 18.11) select and mark the update you wish to commit according to the instructions given in Custom Update. You can mark more than one update at a time. Then confirm your selection withOk.
After you have committed an update, there is no simple way, apart from reinstalling the product, to fall back to a previous version. As soon as the committal has been completed, an Information box appears stating that the committal has been successful.
Please remember that you have to stop the HELIOS services before committing any updates. Otherwise certain processes could be “killed”.
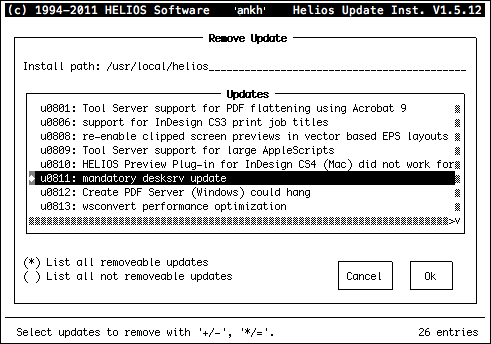
Some updates change the behavior of certain product
modules. To uninstall updates you do not want to work
with, use the Remove Updates option. The respective dialog
window is shown in Fig. 18.12. There may be interdependencies
between several updates, i.e. certain updates cannot be
removed as long as they are required by other updates that
are still installed. The dialog window displays either all
removable or all non-removable updates. Updates you have
already committed can no longer be removed.