HELIOS PCShare 3.0 User manual |
||||
This chapter describes the use of the PCShare Admin by the system administrator or other designated persons in order to configure the PCShare system in a convenient and secure way. It can also be used to set up regular users, groups, and printers on the server.
The PCShare Admin is also available to other, regular PCShare users, to allow them to inspect the current PCShare configuration and printer queues, but only designated persons can make changes (see Security - who can use the PCShare Admin? below).
Important: With the PCShare Admin, version 3.0, you cannot configure a version 2.5 (or older) PCShare. Likewise, a version 2.5 Admin cannot be used for setting up PCShare 3 on the server.
Other chapters in this manual describe how administrative work, which is required to configure and maintain the PCShare System, can be carried out directly on the host, e.g. with the help of a standard editor program such as vi. However, we recommend the PCShare Admin to configure the system since most of these tasks can be carried out much easier by using the PCShare Admin.
The PCShare Admin accesses and modifies various system configuration files, just as if the changes had been made with an editor. However, the PCShare Admin has built-in safety checks to avoid conflicting or invalid configuration settings.
Changes in the configuration files "Preferences" (except
for changes in the "IP access" list, which require a new PCShare client login) and "exports.pcs" will be recognized immediately.
- Any new PCShare volumes will be available immediately.
- Any changes to PCShare volumes, e.g. setting "Groups" membership, will be available immediately.
Make it a habit to use PCShare Admin's feature of sending messages to connected Windows clients to notify these in advance of potential damaging changes. With the option Activities > PC Activities you can verify which users do have certain volumes in access. Just open this menu before you change any settings to volumes and it will list the currently logged-in Windows clients. The PC Activities window will be updated automatically every 15 seconds.
The PCShare Admin is basically available to all PCShare users (via remote login), to allow them to inspect the current PCShare configuration and printer queues, but only the system administrator and members of three special groups (see below) are allowed to make any configuration changes or delete and re-schedule print jobs.
Members of the System Administrator group (default group name "SysAdm") can do all tasks that the system administrator can do with the exception of changing user data for any users with a user ID less than 100 (note that the system administrator has a user ID of 0).
Members of the Printer Administrator group (default group name "PrnAdm") can perform print job related tasks.
The additional Queue Administrator group (default group name "QueueAdm") can change queue settings, i.e. perform all tasks which are related to printer queue configuration and printer queue management.
The PCShare Admin is a UNIX program, and does not support mouse operation. It is designed to be fully operable with the keys available on a standard "vt100"-keyboard. On PC keyboards, additional keys (e.g. cursor keys, Begin, End, etc.) are also supported.
- Positioning the cursor with the cursor keys
- Typing the first letter of the menu item
- Positioning the cursor with the TAB key
In screens with several input fields, you can skip to the next field by means of the TAB key.
In screens with several input fields, you can skip to the previous field with "Shift+TAB".
In lists, the BACKSPACE key deletes the selected entry. In text fields, it deletes the character to the left of the cursor and moves all other text one position to the left in order to fill the gap.
Note: If (on some special terminals/keyboards) BACKSPACE does not work, try DEL) instead.
The DEL key deletes the character under the cursor and moves all other text one position to the left to fill the gap. The DEL key is not always available on a UNIX terminal keyboard.
The cursor is moved to the start of the current field or the first line of the list.
The cursor is moved to the end of the current field or the last line of the list.
The cursor is moved to the previous page of a multiple-page list.
The cursor is moved to the next page of a multiple-page list.
The cursor is moved up one line.
The cursor is moved down one line.
The cursor is moved left one character.
The cursor is moved right one character.
The currently selected function is aborted and the program goes back to the previous prompt or action.
The current input or selection is accepted.
In lists, the Insert key inserts an entry. In text fields, the Insert key inserts a space character at the cursor position.
Refresh the screen display. Sometimes needed for terminals.
Note: If the PCShare Admin application does not display correctly, type Esc and q (for "quit") and then ENTER. You will need to specify an appropriate "TERM" environment variable.
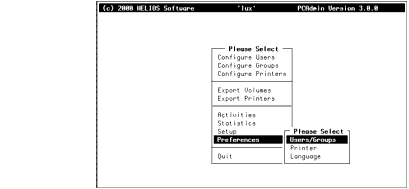
Choosing Preferences from the PCShare Admin opens a window that allows various standard settings for the PCShare Admin to be changed according to your individual taste (Fig. 22).
The settings are stored in the PCShare Admin preferences file ".pcadmin" in the home directory of the respective user (e.g. "/home/john" for user "John" or "/" for "root"), whenever you save changes in the dialogs Users/Groups, Printer, or Language. This allows the PCShare Admin to be configured individually for each connected user.
Three of the default parameters, which are prompted when creating a new user or group, can be specified here: The user's Start program, the Home directory, and the Primary group. Setting appropriate defaults can save time when creating new users, since these three fields are generally configured with similar entries. The entry in the Home directory field should be terminated with a "/" character. The Set user ID and Set group ID flags determine if the respective ID fields are provided in the Configure Users or Configure Groups menus of the PCShare Admin.
Important: When specifying paths in the Spool directory or Home directory fields make sure these higher-level directories already exist!
Use this field to specify the default path to the spool directories which are used when creating a new printer. Setting an appropriate default can save time when setting up new printers since this field is generally the same for all printer queues. The entry in the Spool directory field should be terminated with a "/" character. You should avoid NFS-mounted spool directories because of the loss of performance. If the Smart print job title flag is activated the print job title is automatically displayed - when printing to a network printer - in Unicode (UTF-8) notation.Fig. 23 shows the same print job with (lower window) and without (upper window) the option activated.
Note: The default spool directory is "/var/spool/". In case the required spool directory has a path different than
"/var/spool/" you must state the correct path in the Printer Preferences window. You should always verify the free space in the spool directory you choose, because the space requirements may be high during printing.To verify the free space available, go to "/var/spool/" and issue the "df ." command. Compare the free space value to other file systems by using the "df" command. If necessary, establish a separate file system for spooling.
The pop-up menu Language is used to select the desired dialog language for menus, messages and screen prompts. Please note that currently only English is available.
If you make any changes in one or more Preferences windows, they are only valid after confirming with Ok. Select Cancel to close the Preferences window without saving changes, as the example from the Printer Preferences shows (Fig. 24).
The Select User scrollbox in the Configure Users menu shows all users known to the host (Fig. 25). PCShare automatically creates this list by inspecting the host's system file
"/etc/passwd" (or the appropriate NIS file, compare 7.3 "Configuration with NIS").
In order to change the parameters for a particular user, you have to open the Configure User window that displays all available user information (Fig. 26):
The window shows the user name User, the user Password field, the Full name of the user, the Home directory of the user, the Start program, the Primary group and the list of groups (Current Groups) to which the user belongs. Note that the latter also includes the user's primary group. All fields have to be filled out in a case-sensitive way! The User ID field is only displayed if the Set user ID checkbox has been activated in the Users/Groups Preferences (see Users/Groups Preferences above). The Password field is always displayed empty - this field is only used when the system administrator needs to change or define a user's password.
Important: You must not use accented characters (Umlauts) in the User, Home directory or Start program fields. It is best not to use them in the Password and Full name fields either. Moreover, to be on the safe side, your User name and Password should not exceed eight characters.
The PCShare Admin gets the user information from the file "/etc/passwd", with the exception of the list of groups that the user belongs to, which is obtained from the file
"/etc/group".
Note: If NIS is installed, the information are changed in the appropriate NIS files instead. Note that if NIS+ is installed on your system, user and group data cannot be configured with the PCShare Admin program.
It is now possible to change any of the fields as required. Note that the user Home directory field can be left blank, but Start program and Primary group are obligatory. If the user should not receive the rights to access the UNIX shell,
"/bin/date" can be entered in the Start program field. If the user Home directory field is left empty, it is provided automatically by PCShare.
Note: "/" as a PCShare volume is not allowed at all. Use another directory if "root" needs a private volume, e.g.
"/root" or "/home/root".In order to assign an additional group to the user move your cursor to the Current Groups field and select -New Entry. Then choose the desired group from the Select group scrollbox (Fig. 27).
After confirming the changes the user is assigned to the group. Some UNIX hosts allow up to 8 or 16 groups per user, some 32. The new group name will immediately show up in the Current Groups field.
In order to delete a group from the user's assignments, select the group in the Current Groups field and press BACKSPACE.
Important: This operation should not be confused with deleting a group from within the Select Group scrollbox in the Configure Groups window. Solely the membership of the user in the group is deleted, which is not the same as deleting the group from the system.
Any user must be a member of at least one group. So, if you delete all entries from the user's Current Groups list, the user will automatically become a member of the group "nogroup" (though the entry "nogroup" may be invisible in the user's Current Groups list, depending on the used operating system).
If you make any changes in the user data window, they become only valid after confirming with Ok. Provided that the changes have not been saved, the Cancel field can be used to recall the original data. If an attempt is made to close the window without saving or reverting changes, the PCShare Admin asks whether changes should be discarded or not.
When amending and saving user data, the password is only changed if an entry has been made in the Password field. Note that the Password field is always shown empty, unless entered anew in the active dialog, even if the user has already been allocated a password. On changing the password, the PCShare Admin prompts for the new password to be verified once again, to ensure that no typing mistakes have been made (Fig. 28).
The changed password is entered in the file "/etc/passwd" and in the user list ("$PCDIR/conf/pcpasswd"). It becomes valid after confirming with Ok.
Activate the Configure Users menu and choose -New entry from the Select User scrollbox (Fig. 29).
The PCShare Admin then opens the Configure User window which already contains some default values from the Preferences window. Fill in or change the fields as required (compare Fig. 26).
When typing in the user name, a suggested home directory is automatically filled into the corresponding field. The default suggestion can be changed if required.
A new user is included into the server's users list as soon as you confirm the new entry with Ok. If the user data window is closed without saving, the new user entry is discarded.
On saving the new user, a new entry with the corresponding user data is made in the "/etc/passwd" file. The user ID will be assigned automatically. If groups were specified, these are entered in "/etc/group".
Note: The AIX operating system e.g. does not "like" user and group names longer than 8 characters. If you use longer names, you will receive various UNIX error messages. You may not be able to make a UNIX shell login if your login name is too long, or one of your group names is too long. We recommend to use user and group names of up to 8 characters only.
Select the respective user in the Select User scrollbox of the Configure Users menu and press BACKSPACE.
The PCShare Admin then prompts for acknowledgment of deletion, to allow it to be aborted if required (Fig. 30).
If deletion is confirmed, the entry is removed from the window and the corresponding entries are deleted from the files "/etc/passwd" and "/etc/group". Files in the user's home directory are not deleted. They must be removed manually (e.g. by the system administrator).
Important: Do never delete UNIX users like "bin", "daemon", etc. This may cause serious problems!
The Select Group scrollbox in the Configure Groups menu shows all groups known to the host. PCShare automatically creates this list by inspecting the UNIX system file
"/etc/group" (or the appropriate NIS file).
In order to change the parameters for a particular group, you have to open the Configure Group window that displays all available information about the selected group (Fig. 32).
The window shows the Group name and a list of the Members of the group. PCShare obtains the group information from the files "/etc/group" and "/etc/passwd" (or from the appropriate NIS files).
In Configure Users > Select User (Fig. 25) select the desired user name and open the Configure User window. Move the cursor to the Current Groups field and choose the -New entry option. The Select Group scrollbox offers all the groups to which this particular user (in this example "david") can be assigned (Fig. 33).
Provided that the user is not already a member of this group, he/she will be added to the list of members now.
In order to delete a user from the group's list of members, open Configure Group > Select Group and move the cursor to the group where the user to be deleted resides. Open the Configure Group dialog (Fig. 32). In the Members list select the user and delete the entry. This operation should not be confused with deleting a user from the user list. Solely the membership of the user in the group is deleted, which is not the same as deleting the user from the system.
If you make any changes in the Configure Group window, they become valid after confirming with Ok. Provided that the changes have not been saved, the Cancel field can be used to recall the original data. If an attempt is made to close the window without saving or reverting changes, the PCShare Admin prompts whether changes should be discarded or not.
Activate the Configure Groups menu and choose -New entry from the Select Group scrollbox (Fig. 34).
The Configure Group window opens. Fill in the group name and add members to the group as required (Fig. 32 above).
A new group is entered in the server's groups list as soon as you confirm your new entry with Ok. If the group data window is closed without saving, the new group entry is discarded.
On saving the new group, a new entry with the corresponding group data and member list is made in the "/etc/group" file (or the appropriate NIS files). The "group id" will be assigned automatically.
Note: The AIX operating system e.g. does not "like" user and group names longer than 8 characters. If you use longer names, you will receive various UNIX error messages. You may not be able to make a UNIX shell login if your login name is too long, or one of your group names is too long. We recommend to use user and group names of up to 8 characters only.
The PCShare Admin then prompts for acknowledgment of deletion, to allow it to be aborted if required (Fig. 35).
If deletion is confirmed, the entry is removed from the window and the corresponding entry is deleted from the file
"/etc/group". The file "/etc/passwd" is checked for users who were assigned that group as their primary group; if any are found, the ID for the primary group in the user's entry in the "passwd" file is changed by convention to the group ID of the group "nogroup". The user must then be assigned a new primary group before he/she can log on again.
Important: Do never delete UNIX groups like "bin", "daemon", etc. This may cause serious problems!
PCShare allows you to configure printers which are locally connected to client PCs to receive print jobs from a UNIX spool queue over the network. PCShare Admin's Configure Printers menu allows you to create, modify, or delete these queues.
Open Configure Printers and select a printer in the Please Select scrollbox, which shows all printer queues known to the host (Fig. 36).
You are only allowed to edit entries which were configured for printing over the network to a local PC printer. Entries marked e.g. with a diamond symbol ("u") are not PCShare print queues but EtherShare print queues or others, and cannot be changed - you can only inspect their print jobs. Choosing them will lead to the Printer jobs for `<printer name>' list directly (Fig. 38).
In the following, the term "printer" is meant to encompass all aspects of setting up a particular printer, not only the configuration of the printer's network connection but also the configuration of the associated printer queues.
In order to change the parameters for a particular printer, select it from the list. A window is opened to display information about the printer (Fig. 37).
Before proceeding to configure a new printer, you should switch on the PC you want to print to, attach the printer and switch it on, too. Verify that the PC has made a successful guest connection to the network.
Then choose -New Entry in the Please Select scrollbox. In the opening dialog select Windows Printer.
The Configure Printer window opens, with the Spool Directory field already filled out from the Preferences window (Printer Preferences in 5.3 "Setting Admin preferences").
The Spool Directory field specifies the UNIX directory where print jobs are queued before they are sent to the printer.
Important: If necessary, the spool directory can be set to swap out the spool files to other file systems (hard disks), but you should avoid NFS-mounted volumes due to performance loss. The spool directory must be unique for each printer queue.
After typing in the required logical (UNIX) printer queue name in the Queue Name field and proceeding to the next field, a suggested spool directory is automatically prompted in the corresponding field. The default suggestion, however, can be changed if required. In the Computer Name field the name of the Windows PC which the printer is locally connected to must be specified. Furthermore fill out the User Name and Password fields in case the client PC requires authentication.
Note: The Windows PC must be on the same subnet as the PCShare server.
In the Select Printer scrollbox choose the printer you want to use for the printer queue which you set up.
By use of the View Queue button, current print jobs for the chosen printer (here `ljet') are displayed (Fig. 38).
Jobs can be deleted with BACKSPACE but you cannot change the order (priority) of the jobs. The View Queue button is only displayed after the printer has been created successfully, but not during creation.
The PCShare Admin then prompts for acknowledgment of deletion, to allow the abortion of deletion if required.
If the deletion is confirmed, the entry is removed from the list and the associated printer queue on the host will be stopped and its configuration deleted. The spool directory is not deleted but we recommend to clear any existing print jobs and wait until the printer is idle before deleting the printer queue.
The Select Volume scrollbox in the Export Volumes menu shows all network volumes from this PCShare server which are available in the Network Neighborhood of connected Windows PCs. PCShare automatically creates this list by inspecting "$PCDIR/conf/exports.pcs", which is the PCShare public volume list.
Open Export Volumes > Select Volume scrollbox (Fig. 39).
Note: The entry "~%u" in the Select Volume list stands for the home volume (user home directory).
Before changing volume settings, make sure that the volume is not in use. All users should unmount the volume, because changes take effect immediately and this could lead to strange effects, e.g. if you set a volume to Read only.
In order to change the parameters for a particular volume, you have to open the setup window that displays all available information about the selected volume.
Fig. 40 shows the settings in the Export Volumes window.
The window shows the Volume Name, the UNIX Volume Path, and some options which can be set by means of checking the respective flag.
It is now possible to change the Volume Name, the Volume Path (UNIX directory), and the flag settings for Public,
Hide `dot' files, Read only, Close option, and Create OPI layouts.
Additionally, you can determine whether members of any group are allowed to access this volume, or if it is restricted to selected groups only.
Note: If you change the Volume Path entry keep in mind that PCShare Admin does only create one new subdirectory. Parent directories must already exist.
If it is not desired - for whatever reasons - to have files whose name start with a dot (e.g. ".pcadmin") displayed on the volume, check the Hide `dot' files flag.
Make sure the Read only status reflects the readonly flag
set under UNIX, i.e. that the file system is mounted as "readonly". This must be checked for exchangeable media which are write-protected with a write-protect tab. Otherwise you will not be able to mount them.
By default, the PCShare server intends to hold files open in its cache even if a client closes a file. If you need to prevent PCShare from doing so, e.g. for compatibility reasons with some UNIX applications, the Close option can be activated, forcing the server to close files immediately on client close.
Create OPI layouts is only of importance if EtherShare OPI is installed on the same server (see Notes about installing other HELIOS products in 4.3 "Preparing the installation"). The EtherShare OPI server creates by default layout images of high-resolution originals. If Create OPI layouts is active, layout images are generated. If not, the OPI server does not generate any layouts. OPI settings from the PCShare Admin are stored in "$PCDIR/conf/Preferences".
Note: OPI configuration settings can only be done by use of the EtherShare Admin. For more information see the respective chapters in the EtherShare OPI manual.
If you make any changes in the Export Volumes window, they are valid after confirming with Ok. Provided that the changes have not been saved, the Cancel field can be used to recall the original data. If an attempt is made to close the window without saving or reverting changes, the PCShare Admin prompts whether changes should be discarded or not.
Choose -New entry from the Export Volumes > Select Volume scrollbox (Fig. 41).
PCShare Admin then opens the Export Volumes window. Fill in the Volume Name, and UNIX Volume Path. The entire directory path to the mount point must already exist, with the exception of the bottom-most directory, which will be created by PCShare Admin, if required.
Note: PCShare Admin will not accept overlapping volumes.
Furthermore, although PCShare can utilize file systems which are mounted remotely through NFS, the directory tree of each volume should not be split among more than one file system. Otherwise, the values for used and free space would not reflect the correct status.
The Char Set field in the Export Volumes window (Fig. 42) only appears when creating a new volume and lets you define the character set for the volume. By default, the character set of PCShare volumes is the UTF-8 compatible "PC850" but you can change to the Japanese "SJIS" encoding if necessary.
Important: Already existing volumes (e.g. created under an older version of PCShare) are not verified for character encoding. Hence do not try to modify the character encoding of already existing PCShare volumes manually.
A new volume is entered in the server's volumes list as soon as you confirm your new entry with Ok. If the volume settings window is closed without saving, the new volume entry is discarded.
On saving the new volume, a new entry with the corresponding volume settings is made in the public volume list ("$PCDIR/conf/exports.pcs").
The PCShare Admin then prompts for acknowledgment of deletion, to allow it to be aborted if required (Fig. 43).
If deletion is confirmed, the entry is removed from the window and the corresponding entry is deleted from the public volume list ("$PCDIR/conf/exports.pcs"). Note that if the volume still contains files and folders, they are not deleted. However, they are no longer accessible via PCShare.
UNIX printers must be configured for PCShare before they can be accessed by Windows clients. This process is called exporting the printer.
The Select Printer scrollbox in the Export Printers menu shows all printer queues currently exported to PCShare. PCShare automatically creates this list by inspecting the contents of the "printcap" file and the PCShare configuration file "exports.pcs".
Each printer queue is shown in the Select Printer scrollbox under its own unique Export name. Each queue also has an Export Name, which is usually not the same as the UNIX name. The name that appears in the Network Neighborhood dialog of the Windows PC is stated in the field Export Name.
In order to change the parameters for a particular exported printer, you have to open the data window that displays all available information about the selected printer (Fig. 45).
Open the Export Printers dialog for the desired printer from the Select Printer scrollbox.
Specify initialization and exit strings if required, or leave these fields blank. The initialization and exit strings are sent to the printer before and after each print job. Depending on the type of printer, they can be control code sequences or PostScript code. You can specify in hex (e.g. "\0xc5"), octal (e.g. "\0177"), or decimal (e.g. "\125"). You can also include ASCII strings such as "setpapertray".
Normally, each export name is associated with a single physical printer. However, you may want to allocate more than one export name to the same physical printer, for example to be able to configure different printer initialization strings. In this case, you will have several export names for the same logical (UNIX) printer queue name. Choose their names carefully to indicate their purpose to network users.
Specify input and output character mapping tables (Input Table; Output Table) for character set translation by choosing them from the list or choose No translation (Fig. 46).
The choice of Input Table depends on the printer driver used by the application(s) you want to print from, whereas the choice of Output Table depends on the type of printer.
PC applications use either the PC character set or PostScript. Accordingly, either pc or - PostScript are usually appropriate for the Input Table line in this case.
For more information on how to configure character translation tables see 5.11.2 "Configuring Character Translation" below.
If you only want to map the line terminator character, this is easier than creating a new mapping table.
Important: Do not specify character translation or conversion if you are printing in graphic mode, only use this for text mode.
If necessary, you can export several printer queues for a single physical printer, each configured with different options.
Check the Public flag to specify a public printer, which is then available to guest logins, too. Check the Form Feed flag to cause the print server to send a "form feed" character after the last page of the job.
The PCShare Admin will automatically specify an appropriate UNIX print command, which may also include the pcfilter print job filtering and character set translation utility, depending on the options you choose.
The flags Selected groups, Admit for member of any group, and the Current Groups field are used by the Printer Groups list feature, described below. You will not see the Current Groups box if you have chosen Admit for member of any group..
Select Export Printers > Select Printer > -New Entry. A new Export Printers window opens. Fill out the required Export Name and choose the Queue Name (UNIX name) from the pop-up list (Fig. 48).Again, entries marked with e.g. a diamond symbol ("u") are not PCShare print queues but EtherShare print queues or others.
Note: If you want to use an Export Name longer than 12 characters, which will not work with some Windows clients, a warning message appears before you confirm the selection (Fig.
49).
Open Current Groups > -New Entry to get the Select Group list. From this list choose the desired group (Fig. 50).
In the above example PC printer will only be visible to members of the group other. You can assign several groups to the exported printer if you want to.
Note: You must check the Selected Groups flag if you want to use the Printer Groups feature. If you check Admit for members of any group., the printer will remain visible to all groups and thus to all PCShare users - and the Current Groups box will disappear.
The PCShare Admin then prompts for acknowledgment of deletion, to allow it to be aborted if required (Fig. 51).
Note: If the printer is still busy printing, the current job is successfully completed but additional queued jobs are NOT printed (they must be deleted by hand), and the printer is no longer accessible to new PCShare client logins.
Server Activities shows all users currently logged-on to PCShare or EtherShare. Currently printing workstations and other connections, e.g. PCShare users, are also listed (Fig. 52).
In case you have to terminate a process do not "kill" it manually. Otherwise PCShare clients will not finish properly and run out of license. Instead, highlighting users (only one at a time) in the Server Activities window and then pressing the BACKSPACE key will close their current server connection properly. Note that only the user him/herself, the system administrator or "root" are allowed to clear a connection. The Server Activities option obtains its information from the file "$PCDIR/stmp".
You can send short messages to any Windows NT4/2000 client (for Windows 95/98/Me the WinPopup program must be running) connected via PCShare server. This can be done using the Send Message menu item in the Activities menu (compare Client messages in 3.6 "New features of PCShare 3").
Select Activities > Send Message from the menu and then highlight the user you want to address in the Send Message window. Enter your individual message in the dialog and confirm with Ok (Fig. 53).
The messages then are displayed in a message window on the addressees' monitors. They are not saved in a file; the addressees delete them on closing the respective message window.
Important: The Send to all users option in the Send Message menu lets you send a message to all current users. It is, however, available to "root" and members of the "SysAdm" group only.
Such messages can also be sent from the UNIX server using the UNIX "pcsmsg" program. See also pcsmsg in 7.1 "File server utility programs".
Server log files are arranged by date. Every night at midnight the (UNIX) "cron" program automatically starts a log file renaming program in the background which renames the log file information of the last seven days. The file "Today" becomes the file "Yesterday", "Yesterday" is renamed into "2 days ago", and so on. You can then select e.g. the printer log file of "3 days ago". Log files which are older than seven days are deleted automatically.
Open Statistics > Server Logfile and then specify the desired day (Fig. 54).
The content of the Server Logfile window depends on the operating system. Usually, the log file shows status information from all PCShare and EtherShare servers, such as state, server name, TCP/IP address or name, user name, starting date/time, and login time (Fig. 55).
The PCShare Admin obtains its information from the files "$PCDIR/server.acct" (containing the data of "Today") to "$PCDIR/server.acct.6" ("Seven days ago"). Compare Server log file structure in A 4.1 "PCShare log files".
The Printer account file shows print job accounting details for the selected host, such as job status, printer queue name, user name, starting date/time, duration of job, and the number of printed pages.
Note: Due to the inability of the "smbif" program to handle document names, the column document will always show none for PCShare queues.
3 general UNIX warning
2 PostScript output
1 UNIX info (e.g. extended print information)
0 OK
-1 communications error
-2 PostScript error
-3* terminated job (e.g. killed signal)
-4 UNIX error (e.g. file not found)
Note: While the "smbif" program can only issue the job status success (0) and terminated job (-3*), other HELIOS interface programs use a wider range of status codes. The Printer account file in the PCShare Admin can display this whole range of job status codes (see the job status table above).
Open Statistics > Printer Logfile and then specify the required day (Fig. 56).
Printer account files are arranged by date. Every night at midnight the (UNIX) "cron" program automatically starts a log file renaming program in the background which renames the log file information of the last seven days. The file "Today" becomes the file "Yesterday", "Yesterday" is renamed into "2 days ago", and so on. You can then select e.g. the printer log file of "3 days ago". Log files which are older than seven days are deleted automatically.
In the selected printer account file highlight the print job you want to investigate and press RETURN to see if there is any additional information. For "0", which means that the job has been printed successfully, an extra window opens showing the file size (Fig. 57).
For more detailed information on job status matters see Printer log file structure in A 4.1 "PCShare log files".
The PCShare Admin gets its information from your host's system message file. The location of this file is specified in "/etc/syslog.conf" and depends on the UNIX system. It is e.g. "/var/adm/messages" for Solaris 2.
Note: On some UNIX systems, e.g. Linux, you have to be logged-in as "root" to be able to view the messages file or to open it in the PCShare Admin.
The system message file can grow quite large. It cannot be cleared using the PCShare Admin - the UNIX operating system usually is responsible for keeping it at a manageable size. You may use the "cron" program to activate an appropriate clean-up program in regular intervals.
HELIOS continuously improves all its software products, and improved versions are released now and then. If you ever need to contact our support department they must know the software versions installed on your host (see 8.2 "Support options").
Statistics > Program Versions lists the version numbers of all major server modules and programs (Fig. 59).
PCShare automatically creates this list by inspecting the "$PCDIR/Versions" file.
Important: The "Versions" file is only updated every time PCShare is started.
Besides the program versions, the Program Versions window also provides information about your PCShare, interface, and "syslog" configuration (Fig. 60).
- configure a PCShare bootserver for automatic IP address assignment (DHCP TCP/IP)
- Character Translation to be used for printers
- Browsing in order to set up LMB (Local Master Browser - see 7.5 "About WINS and Browsing") behavior and appearance in the "Network Neighborhood" menu of Windows PCs
- WINS to use the PCShare server as WINS or WINS Proxy
- IP Access to generate an IP access list for the PCShare server (Fig. 61)
- Statically configured from "/etc/hosts" and "/etc/ethers" on the server
- Dynamically configured (DHCP) from "/etc/bootptab" by any DHCP server
- From a PCShare bootserver.
The DHCP TCP/IP option in the Please Select scrollbox of the Setup menu is used to configure a PCShare bootserver. The bootserver allocates IP addresses dynamically (i.e. automatically). This avoids having to configure each client individually with a manually assigned IP address. You also need to configure a bootserver if you want to use static as well as dynamic IP address allocation.
The Interface Configuration screen shows details of the chosen interface name and address, the subnet mask, the gateway to be used by a DHCP client, and details of a bootserver (if existing) configuration (Fig. 62).
First choose Primary in the Bootserver State field. Then assign a range of IP addresses to be set aside for dynamic allocation. In order to do this select -New entry in the Current Ranges scrollbox.
Then specify the IP address range you want to allocate, and confirm with Ok. You can assign several ranges if needed, but make sure they do not overlap. You can also choose another host interface and assign a range on that, too.
The range you specify is checked for plausibility, and if the range spans the host interface itself, it will be split automatically into two ranges.
When you have finished, leave the dialog with Ok, else go to Cancel to discard your changes.
If your network has more than one PCShare server, you can optionally configure an additional bootserver as a backup to guarantee network availability if the main PCShare server is down for any reason. This is called the "Secondary bootserver".
To do this, the PCShare Admin on the host you want to configure as a secondary bootserver must be started. This is because the secondary bootserver configuration file must be stored on the secondary host and not on the primary one.
First choose the IP address of the host interface to be used to service client boot requests, then select Secondary in the Bootserver State field. The Bootserver Name field appears as a data entry field - type in the name (or IP address) of the network interface on the primary host which normally services the boot requests when the primary bootserver is running. You cannot specify any IP address ranges for the secondary bootserver (the secondary bootserver gets this information automatically from the primary bootserver, as long as at least one client PC is allocated an IP address from the primary bootserver).
Fig. 63 shows a secondary bootserver "alpha" configured as a backup bootserver for the primary bootserver "lux".
Choose a host interface and specify Disabled in the Bootserver State field if you want to disable the servicing of client boot requests on the specified interface. Do this if your bootserver host has more than one interface, and one of them should not be used.
Note: If your network has two or more hosts, which are also DHCP server and use NIS, we recommend that you use the Disabled option to disable servicing of boot requests on the interfaces of all other hosts. Else, all hosts will answer boot requests for clients which are configured statically in "/var/yp/hosts" and
"/var/yp/ethers" (or equivalent).The PCShare print server does not normally carry out translation of printer character sets and control codes. In other words, the application you want to print from should be set up for the type of printer you are using.
If necessary, you can optionally use character translation tables for print job filtering and character set translation operations which are commonly required for different types of printers. They are configured individually for each printer queue in the Export Printers mask of the PCShare Admin. The same translation tables can also be used by the pcfilter utility.
The translation tables are always specified as a pair (for input and output, respectively). The two tables communicate via a common character set called "Unicode". See pcfilter in 7.2 "Print server utility programs" for more details.
Choose Setup > Character Translation to edit existing character mapping tables or to create new ones. You first need to specify an Input table and an Output table. Select an existing table (Fig. 64) from the menu, or type in an unused name to create a new custom table which will be filled automatically with default "Unicode" values.
The choice of Input table depends on the printer driver used by the application(s) you want to print with, whereas the choice of the Output table depends on the type of printer.
For example, if the application which is printing uses UNIX character codes, and your printer is Epson-compatible, choose iso8 for the Input table and epson for the Output table.
In the first case, pc is appropriate for the Input table. In the latter case, choose -PostScript for Input Table and Output table in the Export Printers menu rather than choosing a character mapping table for input or output because this is inappropriate for PostScript printers.
Select Ok to edit the tables you have chosen (Fig. 65). The codes for the Input table appear on the left and those for the Output table on the right. The "Unicode" mnemonic for each character is shown in the center (Fig. 66).
Select -New entry to add a new character to the table, or press BACKSPACE to delete one. To edit an existing entry, select it from the list and press RETURN to get the Character Sequences editing window (Fig. 67).
You can jump quickly to the right place in the list by typing the first characters of the "Unicode" mnemonic, e.g. "bel".
Specify the input and output codes for the chosen character in hex (e.g. "\0xc5"), octal (e.g. "\0177"), or decimal (e.g. "\125"). You can also include ASCII strings such as "hello". See pcfilter in 7.2 "Print server utility programs" for details of the allowed syntax. Choose Restore to revert to the default setting.
Confirm your modifications with Ok when you are finished to get back to the previous window (Fig. 66) and choose Check to check your table for mistakes. The tables will be checked for missing sequences and checksums will be calculated (Fig. 68)
The checksums have the purpose of determining whether the tables are identical to the ones provided with PCShare, or whether they have been modified. Warnings are for information purposes only, and errors must be corrected before the tables can be used.
To save space on the screen, missing sequences between ASCII 128 and 255 (hex 0x80 - 0xff) are not listed individually, since codes in this range are often not used and are thus not important. The example above shows two lines of sequences, that are probably missing. If necessary, choose the warning message and press RETURN to list each of the missing codes individually.
Note: If your print job contains character codes which are not specified (i.e. missing) in the chosen input table, these codes are ignored and an error message is written each time to the system messages file. Due to system limitations, a maximum of 10 such messages are written per print job.
Note: If your print job contains character codes which are not specified in the chosen output table, these codes are ignored and not passed to the printer.
The standard character mapping tables provided with PCShare are write-protected and cannot be edited or deleted. Other tables are subject to be edited or deleted.
In order to register onto a Windows network PCShare requires a host name and a domain name. If not differently configured, the UNIX host name is the entry in the Server Name field and the entry "workgroup" in the Domain Name field.
Server Name can be changed if it should be different from the UNIX host name. By default the UNIX host name is used.
By default the entry in Domain name will be "workgroup". If it matches the Windows client domain name it is much easier to access the server in the Windows 98 Network control panel, selecting the Identification setup tab. The domain name can be found in the field Workgroup.
The Avoid elections option is usually turned off. In case you do not want your PCShare 3 host to become LMB (Local Master Browser) check the flag Avoid elections.
If you, however, want to enable cross-subnet browsing of your host, activate the Behave like a Windows NT PDC flag which is usually turned off. If you use a PDC (Primary Domain Controller) it needs to be turned off. If the customer is not using a PDC, he can switch on the Behave like a Windows NT PDC flag, which declares the PCShare server the highest-ranking member of the browser hierarchy. If the machine has 2 or more interfaces it "collects" information about all clients in its domain on all connected segments. This "knowledge" is transferred by the PCShare server via browse list to all clients in its domain. See an example in Fig. 69, with srv as Server Name and helios as Domain Name.
By default, PCShare 3 is WINS. It can provide name,
TCP/IP addresses, etc. when asked by Windows clients (WINS stands for: Windows Internet Name Server).
The WINS name/IP address field is empty by default because PCShare is automatically WINS and will use its own
TCP/IP address for the WINS configuration. Then, the WINS checkbox is activated. If a different computer is WINS, e.g. another PCShare 3 server or a NT-based system the WINS address must be configured, and the WINS checkbox must not be activated. It does not make any sense to have two different WINS in a network because then different clients may have inconsistent views, etc.
Usually WINS Proxy is turned off. If WINS Proxy is turned on, broadcasting nodes can see WINS clients on other subnets but may get confused due to the increased name resolution network traffic. Use this option with care. Never use more than one WINS proxy in the same subnet. Only if WINS Proxy is configured the Proxy registration check checkbox is available. This helps to avoid duplicate computer names. Duplicate computer names in one network will not work reliably.
The Scope Identifier field is usually empty. If the PCShare server is configured to use a scope identifier it needs to be identically to the client configuration. If the identifier is different, the Windows client cannot see the server. It serves to split up the relatively flat NetBIOS name space into several fragments. However, hierarchical structures, as the DNS system provides, do not exist. For more information see also 7.5.2 "Name resolution with WINS" and 7.5.3 "Name resolution with WINS Proxy".
Choose Setup > WINS in order to open the WINS Setup. In the WINS field enter the IP address of the host which acts as WINS server (Fig. 70 shows an example configuration with the host "172.16.0.1" as WINS server).
The Windows Network control panel WINS Configuration needs to be set to Use DHCP for WINS Resolution (compare WINS Configuration in A 1 "Connecting Windows clients to the PCShare 3 server").
If all Windows clients are configured as DHCP clients from a PCShare 3 server the WINS Proxy and proxy registration check are not necessary. This will reduce network traffic.
To protect your site, you might want to create an IP access list to restrict access to your server. You can create such a list on your UNIX server (see A 5 "IP configuration - Reference Part"), but it is much easier to use the PCShare Admin instead. It offers all options that are required for a standard access control configuration. Some additional parameters can be edited in the PCShare configuration file "$PCDIR/conf/pcipaccess". By default, access is restricted to the local network.
If no access list is available, any IP client in the Internet will be able to access your server. The PCShare installation program, therefore, automatically creates an access list. This list will allow all locally connected PCShare clients to access the server (clients on the same network segment), and it will deny access to the server from any other computer outside.
Fig. 71 shows an example of an IP access list. The list is sorted. At first, it contains all addresses of computers/networks from which access is explicitly denied. Then, it lists those from which access is allowed. At the end, it contains a Deny any other entry that denies server access from all computers/networks that do not appear in the list before. The representation of "any other" is 0.0.0.0 (for Address) and 0.0.0.0 (for Mask). If the Deny any other entry was missing, access would - by default - be granted to anybody in the Internet whose address had not been entered in the Deny section. Please note that the Deny any other entry cannot be deleted and should not be removed manually.
The access list will always be sorted that way automatically. This allows the program to go through the list from top to bottom and react very quickly. E.g. if an IP address is denied, the program can send the respective message after going through the Deny section only - it does not have to check the whole list. The checking mechanism is illustrated in Fig. 72 below.
Address contains the IP address of the host/network. An IP address consists of 32 bits (4 groups of 8 bits). This number of bits allows well over 2 billion unique numbers to be used to identify a node on a network. When specifying an IP address, it is common to use a dotted decimal representation of four numbers between 0 and 255 divided by a period (e.g. 192.168.4.40).
Mask is only meaningful for network entries. The mask is structured like an IP address and specifies the number of bits that are relevant to the network identification. It filters out the logical network address. The mask 255.255.255.0 for example specifies that 24 bits are to be compared with the IP number. The remaining 8 bits (that identify the individual computers of a given network) are not relevant.
Comment contains a description or name that may help you remember to whom the respective computer or network belongs.
Select Setup > IP Access from the PCShare Admin menu and then choose -New Entry in the access list to open the Insert IP Access Permission dialog that lets you set up new definitions (Fig. 73).
In the Access field specify whether you want to Allow or Deny either a host (Node) or a network (Net). In the Type and Address section at the top of the menu enter the correct IP Address for Node entries. For Net entries you must specify both Address and Mask (Fig. 74). The Comment field is restricted to 32 characters. The access list will automatically be re-sorted after adding a new entry.
The (Deny any other) entry cannot be removed. For security reasons, it is always kept at the end of the list. There will be rudimentary consistency checks, so you will have to be familiar with IP net/mask structuring and conventions. See your TCP documentation if you have questions.
Important: Under UNIX, there are additional parameters available (allowdomain, denydomain). They are described in A 5 "IP configuration - Reference Part". If someone edited the access list under UNIX and used these parameters, you would get a warning on opening the list with the Admin program again, because the PCShare Admin cannot display the "domain" entry. Editing the list with the PCShare Admin will remove all settings that have been defined under UNIX.
| © 2002 HELIOS Software GmbH |